
Send an announcement to clients

Tobias Gundry
Updated
Use announcements for timetable changes, closures and other updates. Start from Announcements, a class opening or a membership plan to choose who receives the message.
Send to all clients
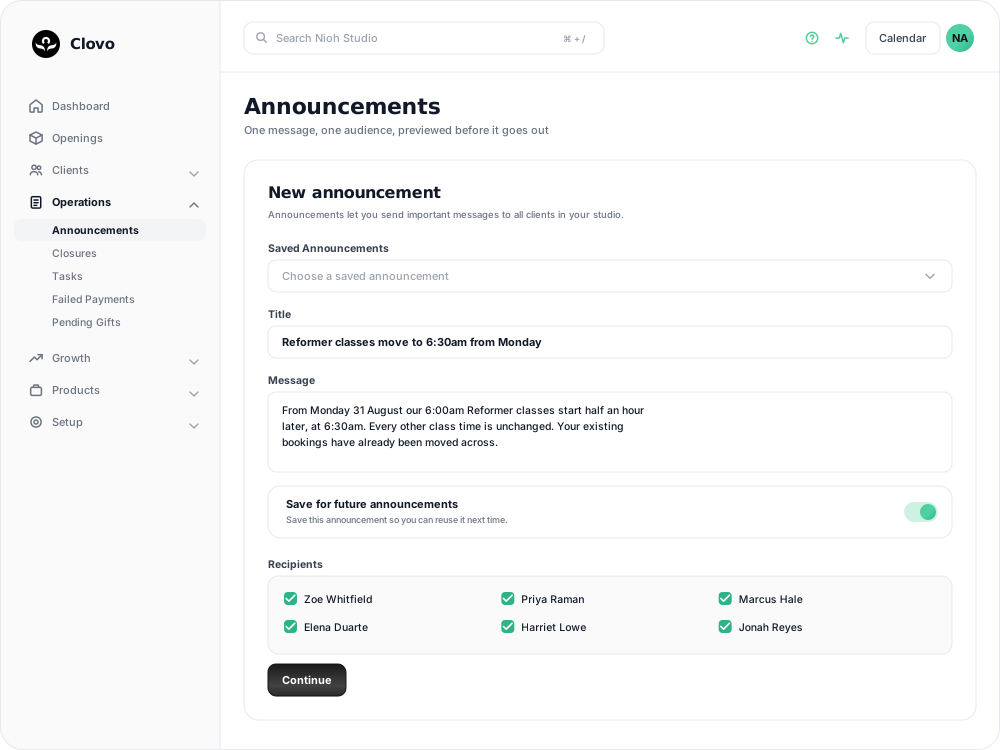
Open Operations → Announcements and select Make announcement. The New announcement form starts with all clients selected under Recipients. Untick anyone who should not receive the message.
Send to people booked into one class
Use the opening's Announcement button for a message about that particular session, such as a change of entrance or something clients need to bring.
- Open Openings and select the class opening for the date and time you want.
- In the Bookings row, select Announcement.
- The announcement form opens with the clients booked into that opening selected under Recipients. Untick anyone who should not receive it, then write and send the message using the steps below.

This targets that one opening, rather than everyone who attends the same class on other dates. Clients on the waitlist or with cancelled bookings are not included.
The opening needs at least one booking before Announcement becomes available.
Send to people on one membership plan
Use the plan's Announcement button for updates that concern its members, such as a change to their membership inclusions.
- Open Products → Plans and select the membership plan.
- Find Current Subscribers and select Announcement on the right of the heading.
- The announcement form opens with the plan's current clients selected under Recipients. Untick anyone who should not receive it, then write and send the message using the steps below.

The recipients are the plan's current clients, rather than everyone listed in its membership history. Members who have already left the plan are not included. See View current subscribers of a membership plan for more about the list.
Write, review and send
Whichever starting point you use:
- Enter a Title and Message.
- Check Recipients to confirm the message will reach the people you intended.
- Select Continue to review the announcement. It has not been sent yet.
- Review the message and recipient list, select Send to … recipients, then confirm the send.
Announcements become available once Clovo has verified your studio. If a button is greyed out, hover over it to see why it is unavailable.
Related articles
Change the reply to address for your studio
Choose where replies go for client emails and staff onboarding emails.
Keep your team's follow-ups moving with the task board
Tasks give studio follow-ups an owner, a due date and a column. Some you create yourself, some Clovo raises for you off a shop sale or a retention alert.
Review, collect or waive a penalty
Review pending penalties and failed collections, retry a fee, waive a penalty or mark it uncollectible in the dashboard or iOS app.
Set up late cancellation and no-show penalties
Set late cancellation and no-show rules, choose credit forfeiture or membership-only fees, and check the penalties applied to bookings.