
Show your memberships, packs and trials on your website

Tobias Gundry
Updated
The plans add-on lists your trials, memberships and class packs on a page of your own website, such as a pricing page. It updates when you change your plans in Clovo, so prices and descriptions on your website stay current.
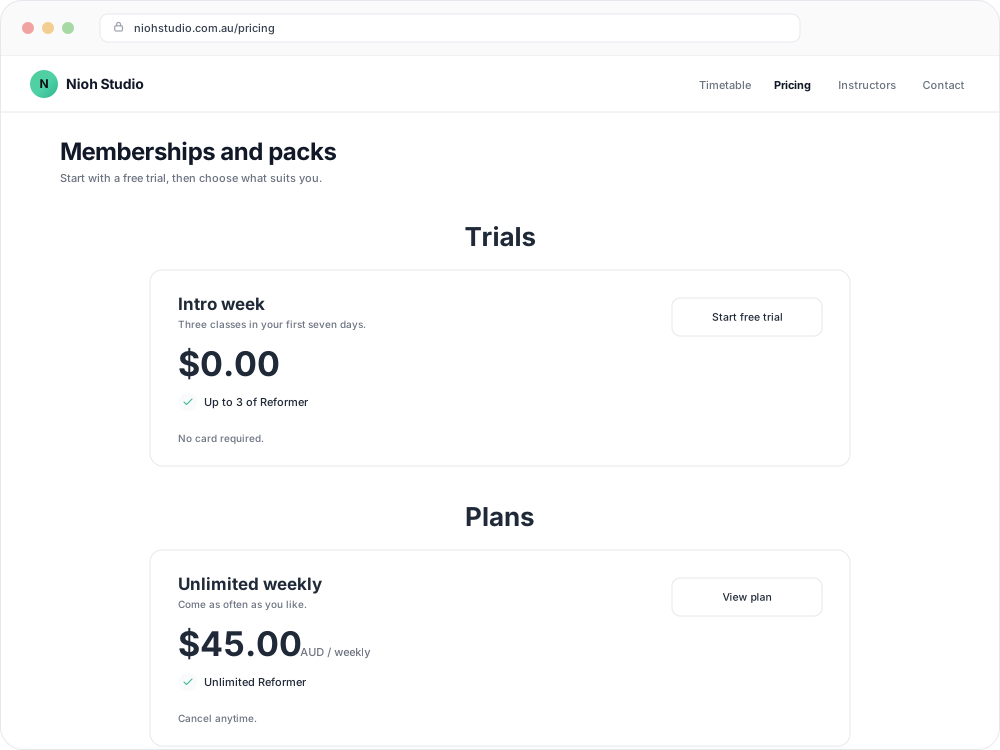
You generate the code for your website in Clovo Dashboard, so copy it from there rather than writing or editing it by hand.
Get your embed code
- In Clovo Dashboard, go to Setup → Integrations.
- On the Clovo Website Add-ons card, click Browse add-ons.
- Open the Plans tab.
- Leave Script selected. It's marked Recommended.
- Click the copy button in the top-right corner of the Embed code panel.
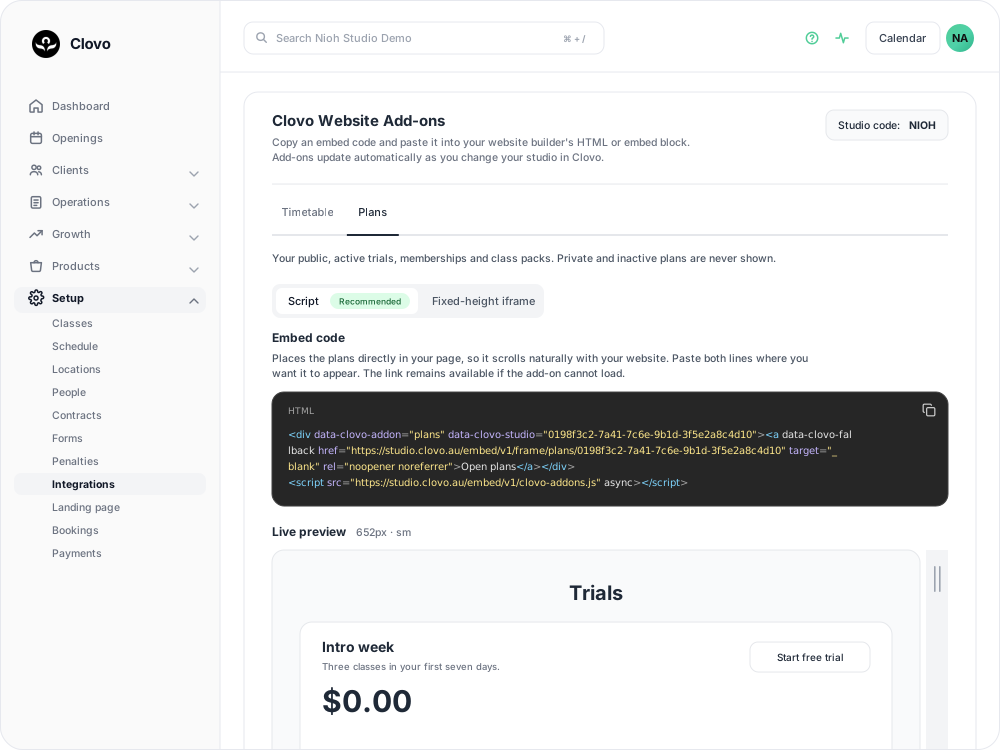
You'll need access to Setup in Clovo Dashboard to open this screen. There are no settings to choose for plans: the add-on always lists every plan that's eligible to appear.
Add the code to your website
Paste the code where you want the plans to appear. Most website builders have a block for this, usually called something like HTML, Code, Custom code or Embed.
- Paste both lines together. Copy the complete code into the same block.
- You don't need to set a height. The plans become part of your page and scroll with it.
- The code includes an Open plans link. Visitors see this link in place of the plans if they can't load, and it opens the plans in a new tab.
Some builders only run embedded code on the published page, not in the editor. If the plans don't appear while you're editing, publish the page and check the live version.
What visitors see
Visitors can browse your trials, memberships and packs, compare prices in AUD, and open a plan to join.
Which plans appear
Only public, active plans appear. Private and inactive plans are never shown, so a plan you share only with selected clients stays off your website. To show or hide a plan, change its visibility or status in Clovo, and your website updates to match. You don't need a new code.
Where the buttons go
The join buttons open the plan on your Clovo landing page in a new tab, where visitors can sign up and pay. They only appear when your landing page is switched on under Setup → Landing page.
If your landing page is off, each row instead asks visitors to open Clovo and use your studio code to find the plan. See share your timetable with clients for switching on your landing page.
If your website blocks scripts
Some website builders don't allow scripts on a page. If yours doesn't, choose Fixed-height iframe above the embed code and copy that code instead.
The iframe shows the same plans inside a box of a fixed height. If the list is taller than the box, visitors scroll inside it, which is less comfortable on phones. You can change the height value in the code to suit your page. Use the script when your website allows it.
If your website uses the older iframe code
If you added your plans to your website before September 2026, your page probably uses the older iframe code. You can recognise it by an address containing /iframe/plans/.
That code still works, and you don't need to change it. We recommend replacing it with a new code from Clovo Dashboard so your visitors have a better experience. The plans fit your page and scroll with it, instead of scrolling inside a tall box, and visitors still get a link to them if they can't load.
To update, delete the older code from your page and paste the new code in the same place.
Troubleshooting
Only an “Open plans” link appears. The plans haven't loaded. Reload the page, then check the embed code if the link still appears on its own. Check that the code was pasted into a block that allows scripts and that both lines are there. If your web developer has set up a content security policy for your site, ask them to allow https://studio.clovo.au for scripts, connections, styles and images. If your builder doesn't allow scripts at all, use the Fixed-height iframe code.
A plan is missing. Check that it's active and public in Clovo.
Rows show a message instead of a button. Switch on your landing page under Setup → Landing page.
Related articles
Show your timetable on your studio’s website
Copy an embed code from Clovo Dashboard to place your live class timetable on your own website, with weekly and monthly views your visitors can switch between.
Accessing your Clovo ‘studio code’ needed for certain integrations
The Clovo Studio Code is a short 4-character alphanumeric string that uniquely identifies your studio. It is used when integrating your Clovo instance with external services like your website.
Add Clovo to your WordPress website with the Clovo WordPress Plugin
Add your live schedule and product listings to a WordPress website with the Clovo WordPress Plugin.
Connect Stripe and check your payment settings
Stripe is what actually moves the money. Here's how to connect it, what the three connection states mean, and which payment settings live in Clovo rather than in Stripe.