
Written by Tobias Gundry
Adding products to your Member Shop is quick and straightforward. Each product you create will be available for members to purchase through your landing page and client apps. This guide walks you through every field in the product creation form.
Navigate to the product form
Go to Products > Shop in your dashboard sidebar. If you have no products yet, you will see a Create Product button in the centre of the page. If you already have products, click the Create Product button in the top right corner of the shop listing.
Fill in the product details
The product form includes the following fields:
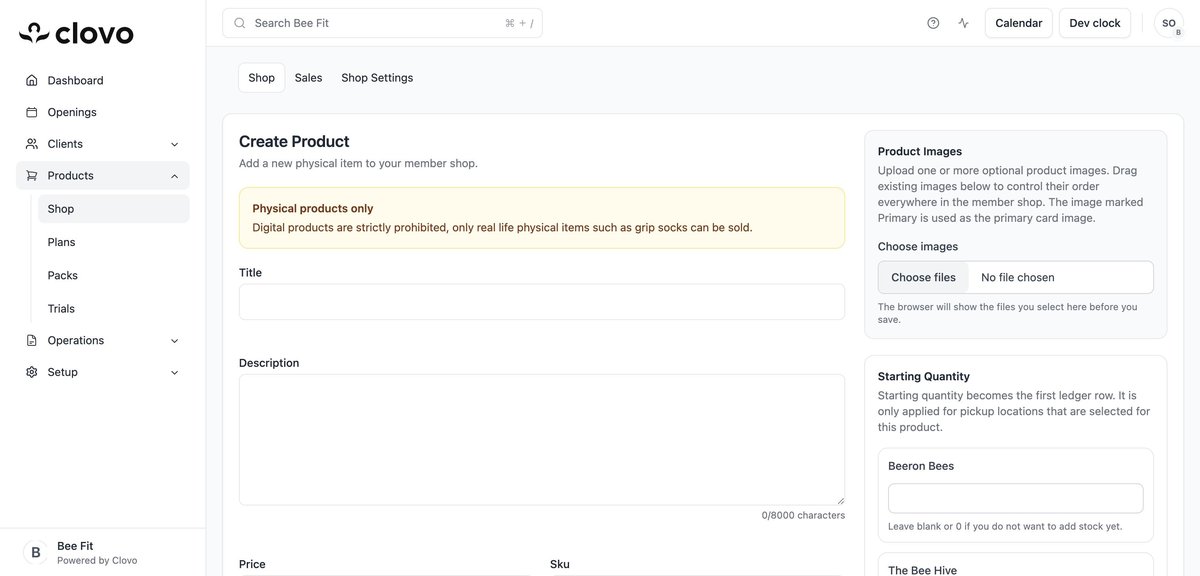
Title
Enter a clear, descriptive name for your product. This is what members will see when browsing your shop. For example: “Grip Socks”, “Yoga Mat”, or “Branded Water Bottle”.
Description
Add a detailed description of your product (up to 8,000 characters). Include useful information like materials, sizing, colours, or any other details that will help members make a purchase decision. This description appears on both the product card and the product detail view.
Price
Set the selling price for the product. Enter the amount in your studio’s currency. For example, enter 15.00 for a $15 product.
SKU
Optionally assign a SKU (Stock Keeping Unit) code for your own internal tracking and inventory management. For example: “GRIP-SOCK-01” or “BOTTLE-BLK”.
Pickup Locations
Select which of your studio locations will stock this product by ticking the checkbox next to each location name. You can select one or multiple locations. Only locations that are checked will appear as pickup options for members purchasing this product.
Starting Quantity
For each selected pickup location, enter the initial stock quantity. This becomes the first entry in the product’s stock ledger. Leave blank or enter 0 if you do not want to add stock yet.
Product Images
Upload one or more product images using the Choose images button on the right side of the form. You can drag images to reorder them after uploading. The first image (marked as Primary) will be used as the main image on product cards throughout the Member Shop and landing page.
Save your product
Once you have filled in all the details, click the Create Product button at the bottom of the form. You will be taken to the product detail page where you can review everything, see the stock ledger, and make further adjustments if needed.
Edit an existing product
To edit a product after creation, navigate to Products > Shop, click on the product card, and then click the Edit button on the product detail page. You can update the title, description, price, SKU, pickup locations, and images at any time.
Remember: the Member Shop only supports physical products. Digital products such as online courses or downloadable files are not permitted.
-
Location in Clovo
-
Estimated Time To Complete
15 -
Information For
Studio Owner -
Platform Components
Clova Studio, Clova iOS, Clova Android -
Last Updated
April 8, 2026 -
Need more help?
Get in touch hello@clovo.au