
Change the branding of your clients' Clovo apps

Tobias Gundry
Updated
Clients experience the booking app as part of your studio, so its branding helps keep the booking experience consistent with the rest of your studio.
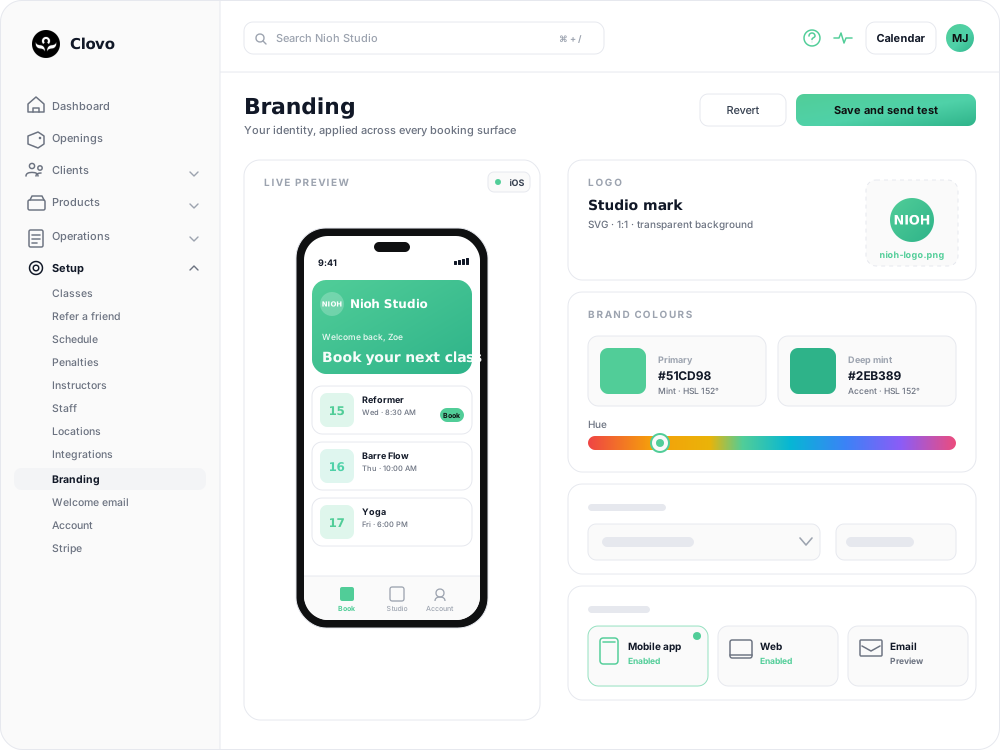
The Branding screen is where you make that true: upload your logo, pick two colours, and Clovo carries them through the client apps, your landing page, booking emails and invoices.
There is no custom app project to commission and no App Store resubmission. Three settings, one button.
Before you start
Have these ready so you are not hunting for files mid-edit:
- A logo file. PNG, JPG, WEBP or GIF, up to 6 MB. A transparent PNG at a 1:1 aspect ratio gives the best result — it sits cleanly against both light and dark backgrounds in the app.
- Two hex colours. A primary colour for headings, buttons and the active tab, and a secondary colour used sparingly as a highlight.
You will need the Owner or Setup role to open the Branding screen.
Apply your branding
- In Clovo Studio, go to Growth → Branding. If you are on the dashboard, the Setup Branding shortcut on your onboarding checklist takes you to the same place.
- Under Studio logo, choose your logo file. The preview on the right updates the moment you select it — before you save anything.
- Under App colours, set your Primary colour. Click the swatch or Pick colour to use the colour picker.
- Set your Secondary colour the same way.
- Check the previews (see below), then click Publish changes in the page header.
You will see "App theme updated successfully!" when it saves. Changes are live straight away — there is no build, review or approval step.
Check the contrast reading
Under each colour you will see an Accessibility (contrast) reading with two results — one on light and one on dark — labelled Good, Fair or Low.
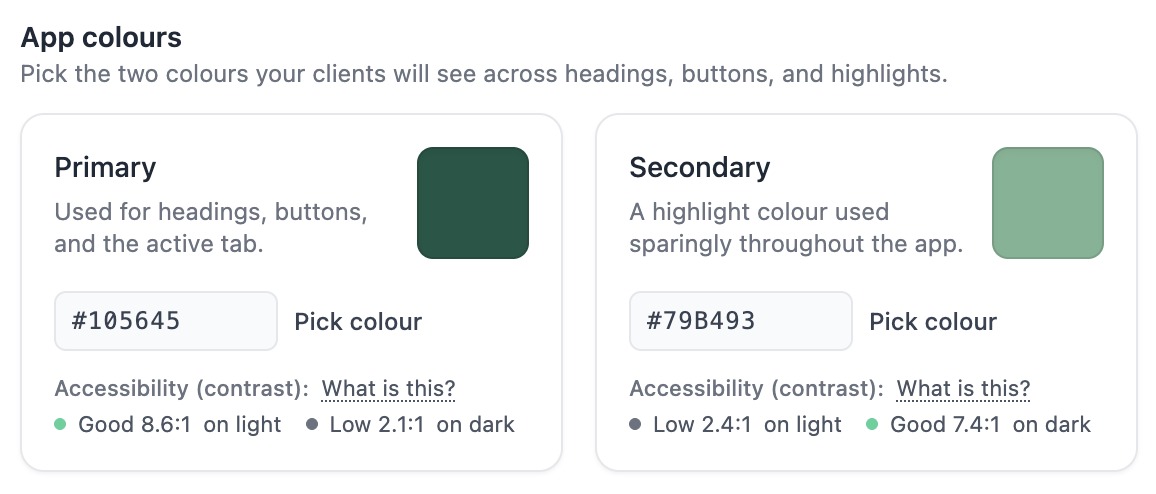
These follow the WCAG guidelines: 4.5:1 or better for regular text, 3:1 for larger text. A Low rating means the colour will be hard to read for clients with low vision, particularly on a phone in daylight.
This reading is advisory and does not block publishing. A colour that looks clear on your monitor may be harder to read on a client's phone, so use the ratio as a guide.
Review the previews before you publish
Everything on the right of the screen updates live as you change your logo and colours.
The phone preview has three tabs along the bottom — Book, Our Studio and You — showing your branding on the booking list, your studio profile and the sign-up screen. Your logo appears at the top of the Our Studio screen.
The Previews card below has three more tabs:
- Email — a booking confirmation, showing how your logo sits in transactional email.
- Invoice — shows how your branding will appear on client invoices.
- Landing Page — your public booking page at
your-studio.clovo.app.
Look at the logo on each one. A wordmark that reads well on the app home can crop awkwardly in a circular avatar, and a mark that looks crisp on your screen can turn muddy on an invoice.
Where your branding shows up
Once published, your logo and colours are used across:
- The Clovo client apps on iOS and Android
- Your landing page and its product sections
- Booking confirmations, receipts and other transactional emails
- Invoices and payment touchpoints
- Timetable social images you share to Instagram or Facebook
- The calendar in your Clovo Studio dashboard
Frequently asked questions
How long do changes take to appear?
They are live immediately. Clients may need to close and reopen the app to pick up the new branding.
Can I upload an SVG logo?
No. Use a PNG, JPG, WEBP or GIF. A transparent PNG is the best choice for a logo.
My logo was rejected. Why?
The file is over 6 MB, over 25 megapixels, or is not a PNG, JPG, WEBP or GIF. The error message under the field will tell you which. Export a smaller version and try again.
Do my old invoices update to the new colours?
No. Each invoice stores the colours it was generated with, so invoices already issued keep their original branding. New invoices use your current colours.
Related articles
Use dark mode in Clovo
Switch the Clovo Dashboard to dark mode from your account menu, understand where the setting is remembered, and see how the iPhone and Android apps follow each person's own device.
Ask members to leave a Google review after they review your studio
Add your Google Business Profile review link so members can copy their Clovo review and continue to Google.
Collect and manage reviews from your members
Turn on Clovo reviews so eligible members can share feedback, then review and publish their responses from Clovo Studio.
How to manage your studio from an iPad
Use the Clovo iPad app to manage classes, clients and staff tasks, or run a self-serve check-in kiosk.