
Choose which notifications you and your staff receive

Tobias Gundry
Updated
Notification preferences decide which studio events reach you by email and push notification. They are set per person, so each member of your team can be told about different things.
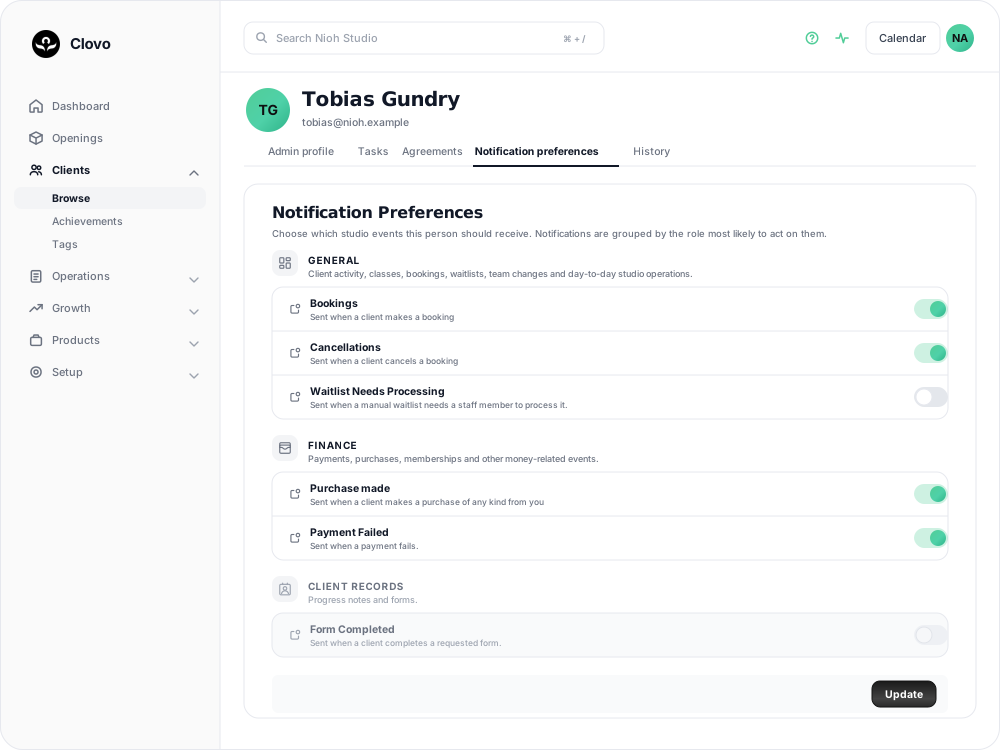
Notifications are grouped by role
Preferences are arranged into three groups:
- General — client activity, classes, bookings, waitlists, team changes and day-to-day studio operations.
- Finance — payments, purchases, memberships and other money-related events.
- Client Records — progress notes and forms.
Every staff member who can sign in to the dashboard can use General. Finance and Client Records are only available to people who hold the matching role. Owners can receive every group.
A group someone cannot receive still appears on the screen, greyed out, with its switches fixed off.
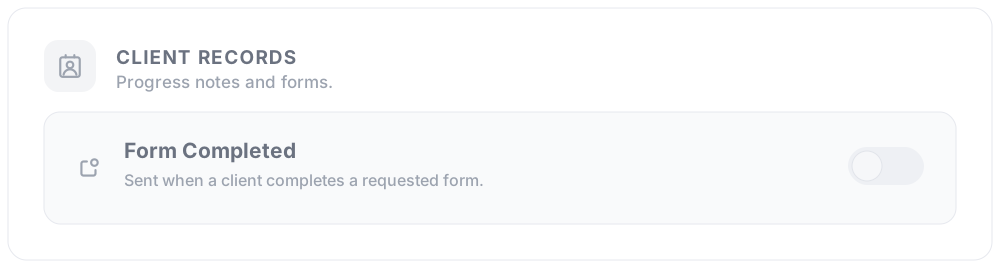
Nothing in a greyed-out group is sent to that person, so a notification cannot reach someone whose role no longer covers it. If a teammate needs one of those notifications, give them the matching role first — see Add a staff member and give them access.
Change your own preferences
-
Open the account menu from your initials at the top right of the dashboard.
-
Choose Notification Preferences.
-
Use the switch beside a notification to turn it on or off.

-
Select Update.
Change someone else's preferences
Owners and staff with the Setup role can set notification preferences for anyone else on the team. This is useful when someone is away, when duties move between people, or when a new starter is receiving more than they need.
-
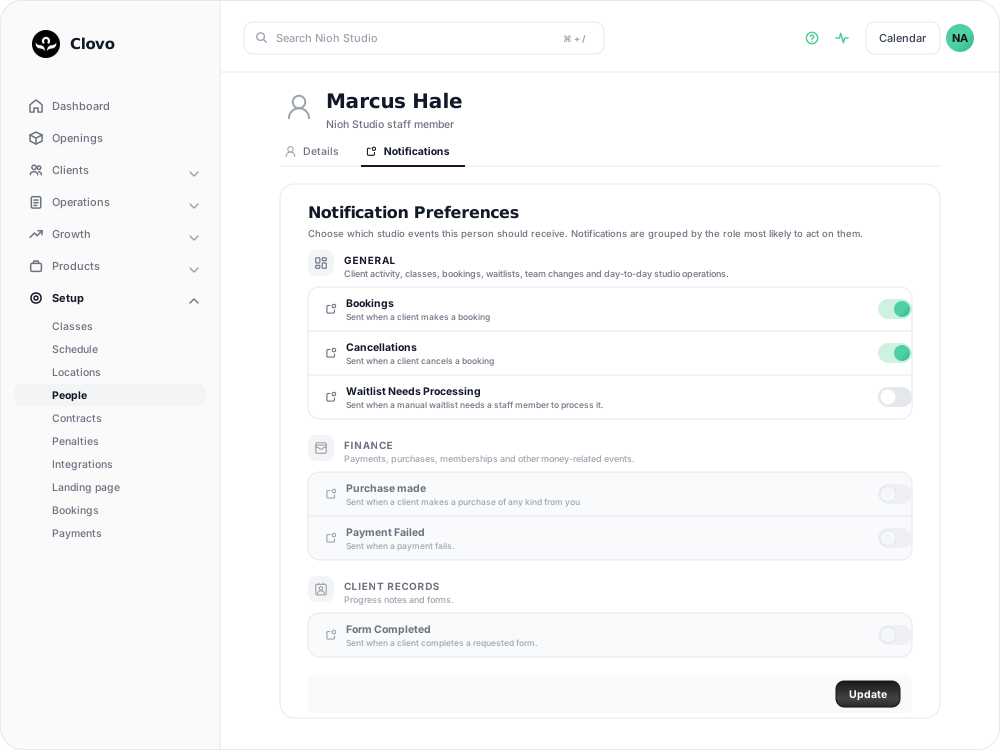
Go to Setup → People → Staff Accounts and open the staff member.
-
Open the Notifications tab.
-
Turn notifications on or off, then select Update.
The change is recorded on that staff member's History, naming both of you.
The Notifications tab is not offered on your own staff record. Use the account menu to change your own preferences.
If a notification is not arriving
- Check the switch for that notification is on for the person who needs it, in the group it belongs to.
- Check they hold the role that group needs. A notification in a group they cannot receive is not sent, even if it was switched on before their roles changed.
- After you give someone a new role, open their Notifications tab and turn on what they need. Granting a role makes the group available; it does not switch anything on.
Cancellations, failed payments and waitlists that need processing often need someone to act quickly, so decide who is covering each of them before switching them off.
Related articles
Add a staff member and choose their roles
Add staff under Setup → People, give them dashboard access, and choose the Setup, Finance or Client Records roles they need.
Customise your dashboard layout
Turn dashboard cards on or off, put them in the order you want, and choose where the activity timeline sits — all saved to your own staff account.
Read your Studio Health Check
A scored, printable report that reviews your studio's setup, revenue, retention, growth and engagement, and links straight to the screen that fixes each finding.
Staff roles and permissions
A detailed reference for Staff, Setup, Finance, Client Records and Owner access, including role combinations for forms, payments and staff management.