
Build a client form with the Form Builder

Tobias Gundry
Updated
The Form Builder lets you create reusable health and intake forms, as well as forms for check-ins or other records. You can make a form self-service so a client completes it in the Clovo app, leave it for staff to complete from the client’s profile, or have Clovo send a self-service form automatically.
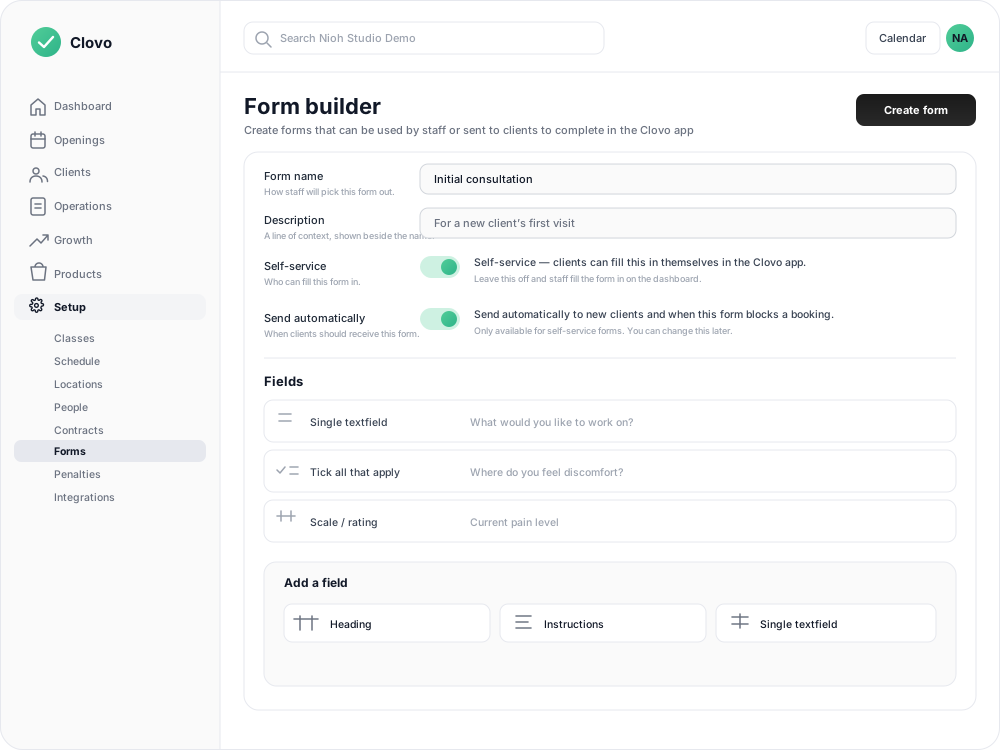
Create a form
For the sidebar workflow below, staff need both Setup and Client Records; owners already have access. Client Records also allows form management through a direct link. See Staff roles and permissions for the difference.
- In Clovo Dashboard, open Setup → Forms.
- Select Form builder.
- Enter a Form name. This is the name staff will choose on a client profile.
- Add an optional Description. It gives staff context when they select the form.
- Turn on Self-service if clients should complete the form in the Clovo app. Leave it off when staff will fill it in on the dashboard.
- Turn on Send automatically to have Clovo send the form to new clients and whenever the incomplete form blocks a client’s own booking.
- Add at least one field, then select Create form.

Self-service is required when you want to send a form to a client’s device, whether the request is manual or automatic. A staff-only form can still be used to record information on a client’s behalf. See send forms to clients automatically for when the automatic request is created.
Add and arrange fields
Select a component under Add a field to add it to the form. Use the handle to drag a field, or use the up and down arrows, to change the order. Use Remove field when you no longer need a field.
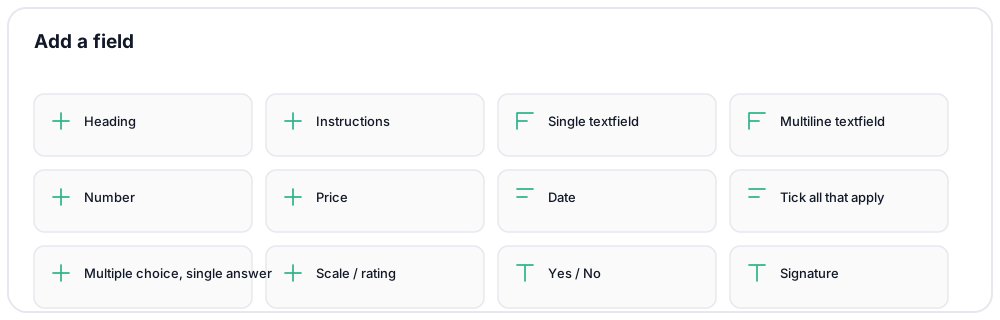
Each question field can have a label, optional description and Mandatory field setting. Mark a question as mandatory when the person filling in the form must answer it before they can submit.

Form components
Use the component that matches the kind of answer you need:
| Component | Use it for |
|---|---|
| Heading | A section title that separates parts of the form. It does not collect an answer. |
| Instructions | Guidance or context for the person filling in the form. Blank lines become separate paragraphs. |
| Single textfield | A short, one-line answer such as a goal or contact preference. |
| Multiline textfield | A longer answer that may need several lines. |
| Number | A plain number, such as a count, measurement or height. |
| Price | An amount in dollars. |
| Date | A date selected from a calendar. |
| Tick all that apply | A choice question where the person can select any number of options. |
| Multiple choice, single answer | A choice question where the person must select exactly one option. |
| Scale / rating | A numbered rating, such as pain from 0 to 10 or confidence from 1 to 5. |
| Yes / No | A question with a yes or no answer. |
| Signature | A signature drawn with a mouse, trackpad or finger. |
Text and content fields
Use Heading and Instructions to make a longer form easier to follow. These are content fields, so they do not have a mandatory setting and do not ask for an answer.
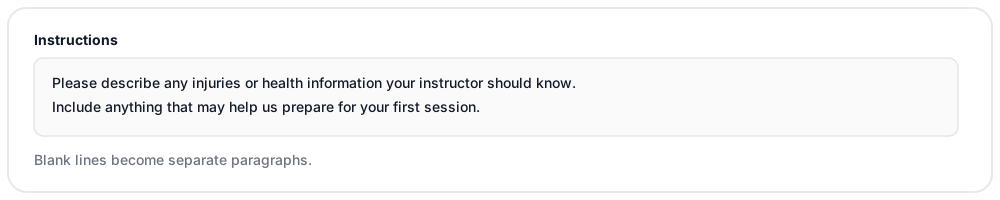
For an answer, choose Single textfield for a short response or Multiline textfield when the person may need more space. Number, Price and Date guide the person towards the matching type of information.

Choice fields
Choose Tick all that apply when more than one answer can be true. Choose Multiple choice, single answer when the person must choose one answer. Add the options under Choices, then select Add choice for another option.

Give each option enough context to stand on its own. A tick-all-that-apply field needs at least one choice; a single-answer multiple-choice field needs at least two.
Scale and rating fields
Use Scale / rating for a measurable range. Set the Minimum and Maximum, then add optional labels such as No pain and Worst pain so the ends of the scale are clear.
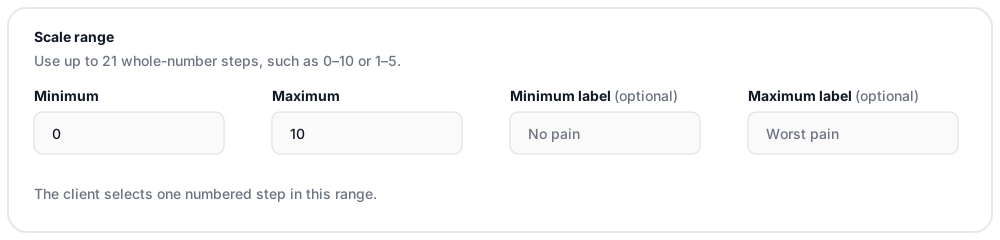
The scale can contain up to 21 whole-number steps. For example, use 0–10 for a pain score or 1–5 for a confidence rating.
Use or update a form
After you create a form, staff can select it from the Forms tab on any client profile. Self-service forms can be requested from the client’s device; staff-only forms are filled in on the dashboard.
You can change automatic sending later, even after answers have locked the form’s questions. Open the form under Setup → Forms, change Automatic sending, then select Save. Archiving the form turns automatic sending off.
Once a form has been submitted, its questions can no longer be changed. If you need a revised version, open the form and choose Duplicate to create a new form, then edit the copy. Archive an old form when staff should no longer start it for new clients.
You can use a form as a booking requirement for a class. See require a form before clients book a class for the class setup steps.
If Clovo shows a validation message
- Add a field if the form does not contain one yet.
- Add choices if a choice field is incomplete. Use at least one option for Tick all that apply and at least two for Multiple choice, single answer.
- Check the scale range if the minimum and maximum are not whole numbers, the range contains more than 21 steps, or the minimum is not below the maximum.
Related articles
Require a form before clients book a class
Make one or more completed forms, including health and intake forms, a condition of self-booking a class, while keeping a staff override for bookings you add yourself.
Send a form to a client in the Clovo app
Request a self-service form from a client, see when it is completed, and understand how manual and automatic requests appear in the Clovo app.
Send forms to clients automatically
Automatically request a self-service form when a client joins your studio or when the incomplete form blocks their booking.
Set up a clinical intake and track client progress over time
Design a health and intake form that captures injury history and goals, make it a condition of the first class, then follow the client's progress with reassessments and progress notes.