
Accessing your Clovo ‘studio code’ needed for certain integrations

Tobias Gundry
Updated
The Clovo Studio Code is a short 4-character alphanumeric string that uniquely identifies your studio. It is used when integrating your Clovo instance with external services like your website.
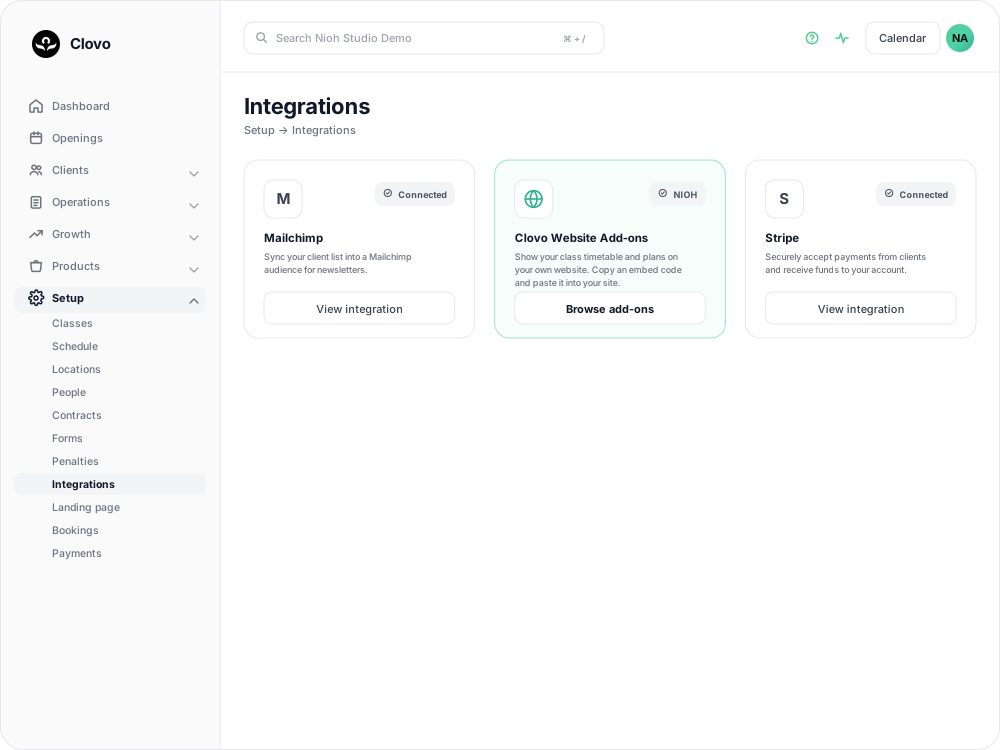
Where to find your studio code
To access your Clovo Studio Code:
- Log in to Clovo Dashboard on the desktop.
- Navigate to Setup > Integrations.
- Your studio code is shown in the top-right corner of the Clovo Website Add-ons card. It also appears at the top of the Website Add-ons screen when you click Browse add-ons.
When you need your studio code
- WordPress plugin — configuring the Clovo WordPress Plugin requires your studio code.
- Plans on your website without a landing page — if your landing page is switched off, the plans add-on asks visitors to use your studio code in Clovo to find each plan.
You don't need your studio code to put your timetable or plans on your website. The embed codes you copy from Clovo Dashboard already identify your studio. See show your timetable on your website and show your memberships, packs and trials on your website.
Related articles
Send staff alerts to a Slack channel
Connect a Slack channel to Clovo, choose which staff alerts it receives and send a test alert to check your team can see them.
Connect Clovo to Mailchimp
Connect your Mailchimp account and choose the audience that receives your studio's client details.
Connect Stripe and check your payment settings
Stripe is what actually moves the money. Here's how to connect it, what the three connection states mean, and which payment settings live in Clovo rather than in Stripe.
Show your timetable on your studio’s website
Copy an embed code from Clovo Dashboard to place your live class timetable on your own website, with weekly and monthly views your visitors can switch between.