
Show your timetable on your studio’s website

Tobias Gundry
Updated
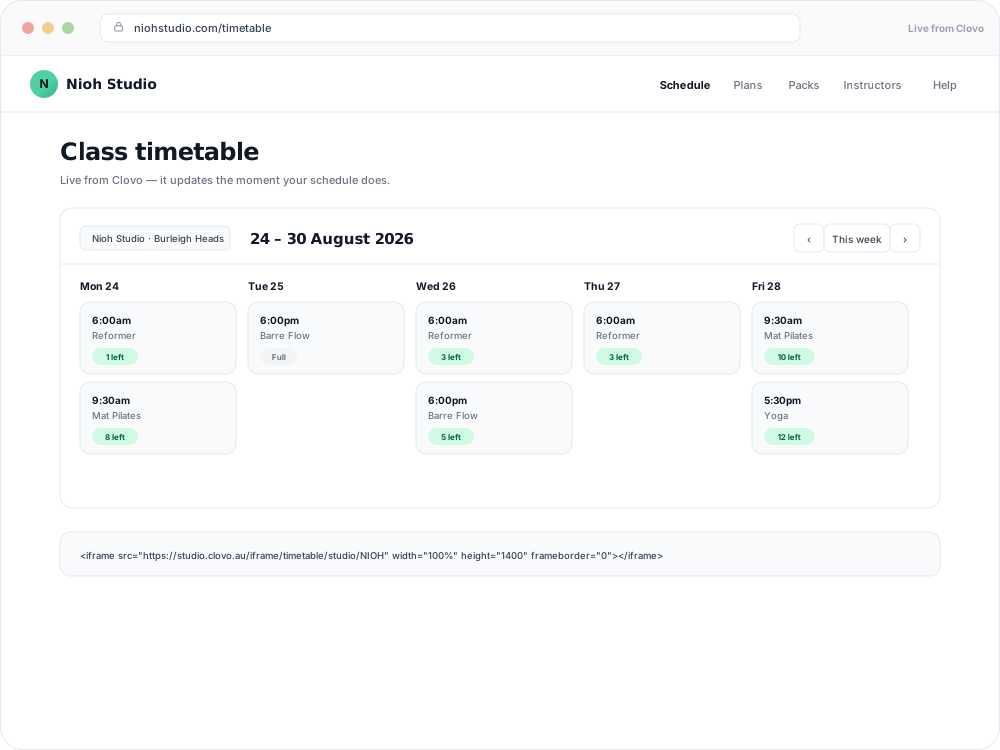
Adding your live class timetable to your website gives new clients a current view of your schedule. Follow the steps below to integrate your timetable using an iframe.
What You’ll Need:
- Access to your website’s content editor or HTML files.
- Your unique integration code available in Clovo under Setup > Integrations.
Step-by-Step Instructions:
- Locate the Timetable Integration Code
Use the following iframe code as a template for embedding your timetable:
<iframe src="https://studio.clovo.au/iframe/timetable/studio/ABCD" width="100%" height="1400" frameborder="0"></iframe>
- Replace the Placeholder Code (
ABCD)
ReplaceABCDin the iframe’ssrcURL with your unique integration code. For example, if your integration code isXYZ123, the iframe code would look like this:
<iframe src="https://studio.clovo.au/iframe/timetable/studio/XYZ123" width="100%" height="1400" frameborder="0"></iframe>
- Add the Code to Your Website
-
If you’re using a content management system (CMS) like WordPress:
- Open the page or section where you want the timetable to appear.
- Switch to the “HTML” or “Code” view in your editor.
- Paste the modified iframe code into the desired location.
-
If you’re directly editing the website’s HTML files:
- Open the file in a text editor.
- Paste the iframe code where you want the timetable to be displayed.
- Save and upload the updated file.
- Test the Integration
- Visit your website and navigate to the page where the timetable is embedded.
- Confirm the timetable loads correctly and displays your live schedule.
- Optional: Adjust the height if needed
The height in the iframe code is set to1400pxby default, but you can adjust this value to better fit your website’s layout. For example:
<iframe src="https://studio.clovo.au/iframe/timetable/studio/XYZ123" width="100%" height="1200" frameborder="0"></iframe>
Are you using WordPress?
Clovo offers a WordPress plugin that adds your live schedule to your website. Learn more here.
Need Help?
If you encounter any issues or have questions about your integration code, contact Clovo support for assistance. We’re here to ensure your live timetable works seamlessly on your website.
By embedding your timetable, you provide clients with a real-time view of your schedule, making it easier for them to book and stay engaged with your studio.
Related articles
Connect Stripe and check your payment settings
Stripe is what actually moves the money. Here's how to connect it, what the three connection states mean, and which payment settings live in Clovo rather than in Stripe.
When will I get my first payout?
Your first Stripe payout may take longer than future payouts. Here is the timing to expect, where to see the date in Clovo, and what to check if it is delayed.
Accessing your Clovo ‘studio code’ needed for certain integrations
The Clovo Studio Code is a short 4-character alphanumeric string that uniquely identifies your studio. It is used when integrating your Clovo instance with external services like your website.
Add Clovo to your WordPress website with the Clovo WordPress Plugin
Add your live schedule and product listings to a WordPress website with the Clovo WordPress Plugin.