
Add and manage your instructors

Tobias Gundry
Updated
An instructor profile is what a client sees before they book: a photo, a name, a professional title and a few lines about who will be leading the class. It is public, and it is separate from the staff account an instructor may also need in order to sign in to Clovo.
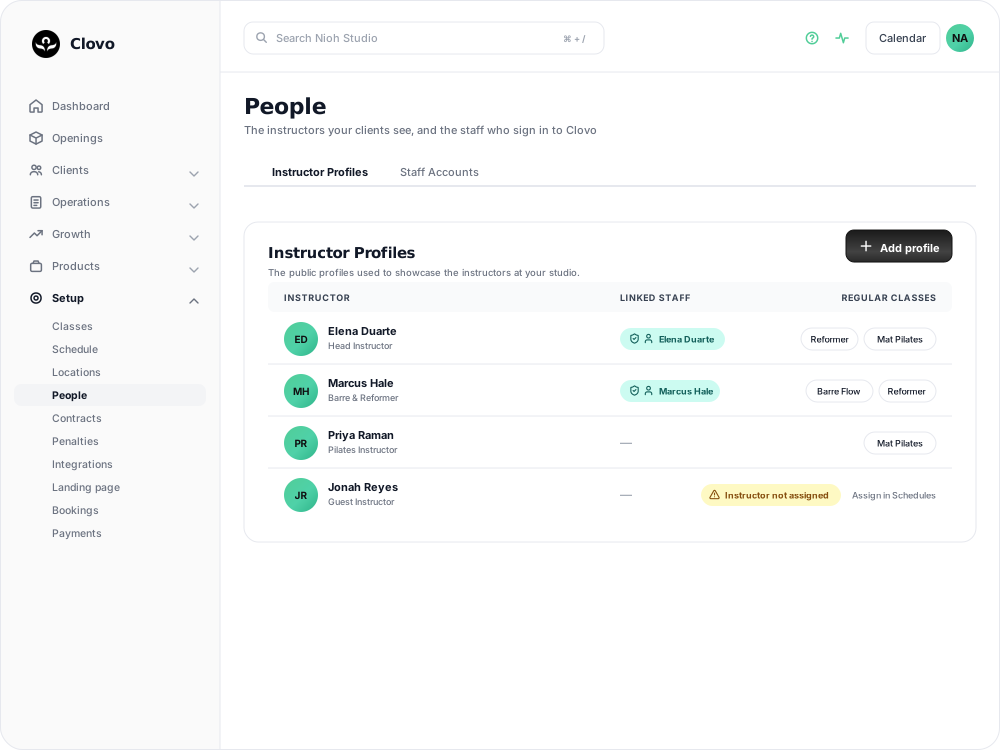
Add an instructor profile
- Go to Setup → People and open the Instructor Profiles tab.
- Select Add profile. Before you have created your first instructor, the screen offers Create instructor instead.
- Fill in the form, which is headed Create a new instructor profile.
- Select Create.
You will need the Owner or Setup role to open this screen.
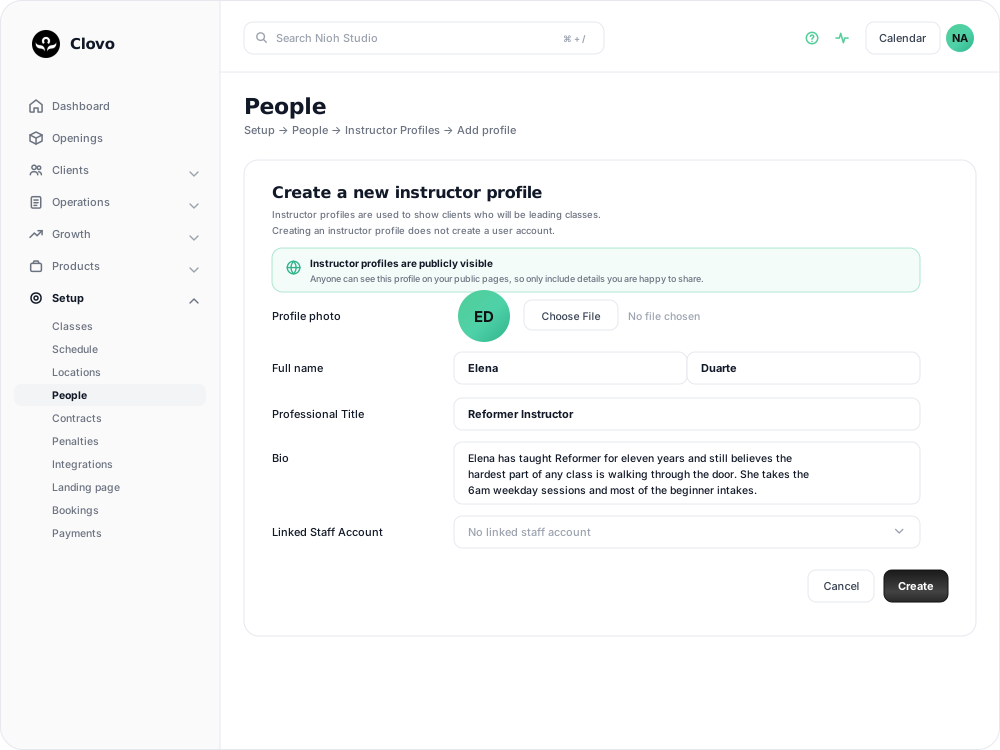
What goes in each field
- Profile photo — optional. Upload a PNG, JPG, WEBP or GIF up to 6 MB. It is shown as a circle, so a square image crops best.
- Full name — two boxes. A first name is required; a last name is optional, so a single-name profile is fine.
- Professional Title — required, and shown under the name wherever the profile appears. The form suggests the shape it is after with Eg. Pilates Instructor.
- Bio — required, up to 8,000 characters.
- Linked Staff Account — optional, and covered below.
Everything except the linked staff account is public. The form says so on screen: anyone can see the profile on your public pages, so only include details you are happy to share.
The photo, title and bio help clients choose between classes. A specific title and a short description of what the instructor teaches and how a session with them feels can be more useful to a newcomer than a long list of qualifications.
Link a staff account
Creating an instructor profile does not create a login. If the instructor also needs to sign in — to see their own upcoming appointments, for instance — they need a staff account as well, and Linked Staff Account on this form is what joins the two.
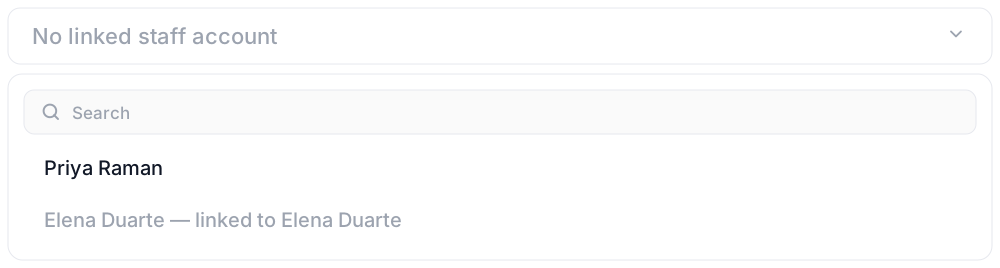
A staff account can be held by one instructor profile at a time. An account another profile already holds still appears in the list, but you cannot choose it — it reads {name} — linked to {profile} so you can see where it is linked. To move it, open the profile holding it, select Remove linked staff account, save, then come back and choose it here.
For the fuller picture of why the two are separate, see linking public instructor profiles to staff accounts.
Manage existing profiles
The Instructor Profiles list has three columns:
- Instructor — the photo, name and title. Select the row to open the profile for editing.
- Linked Staff — the staff account behind the profile, or a dash when there is none.
- Regular Classes — the classes this instructor regularly takes. A profile with none is flagged Instructor not assigned, with a link through to Schedules where you can assign them.
Editing works the same way as creating, ending in Update rather than Create, and the changes go out to your apps.
To change the photo, upload a new file. To take it away entirely, select Remove photo and confirm; the page reloads at that point, so save any other edits first.
Delete at the bottom of the edit screen removes the profile. If the instructor is still on regular schedules, Clovo will keep the profile and ask you to remove them from those schedules first.
Once a profile exists, you assign the instructor to classes when you set up your schedule, and clients see who is teaching before they book. If someone cannot make a single session, you can assign a substitute for that opening without changing the schedule.
Related articles
Add a staff member and choose their roles
Add staff under Setup → People, give them dashboard access, and choose the Setup, Finance or Client Records roles they need.
Staff roles and permissions
A detailed reference for Staff, Setup, Finance, Client Records and Owner access, including role combinations for forms, payments and staff management.
Linking public instructor profiles to staff accounts
In Clovo, instructor profiles and staff accounts are separate concepts. People running your classes may not need access to Clovo, while people who need access to Clovo may not run classes.
Assign a substitute instructor for a class
Put a different instructor in front of a single class opening, and know what your clients will and won’t be told about the change.