
Record client progress with Progress Notes

Tobias Gundry
Updated
Progress Notes give your team a private place to record how a client is progressing over time. Each note stays with the client’s profile, so you can return to earlier observations whenever you need them. Clients cannot see these notes in the Clovo app.
Progress notes are open to owners and to staff who hold the Client Records role. If you select the tab and Clovo refuses access, ask an owner or a staff member with the Setup role to add that role to your staff record.
Open Progress notes
- In Clovo Dashboard, open Clients.
- Select the client.
- Open the Progress notes tab on their profile.
- Select New.
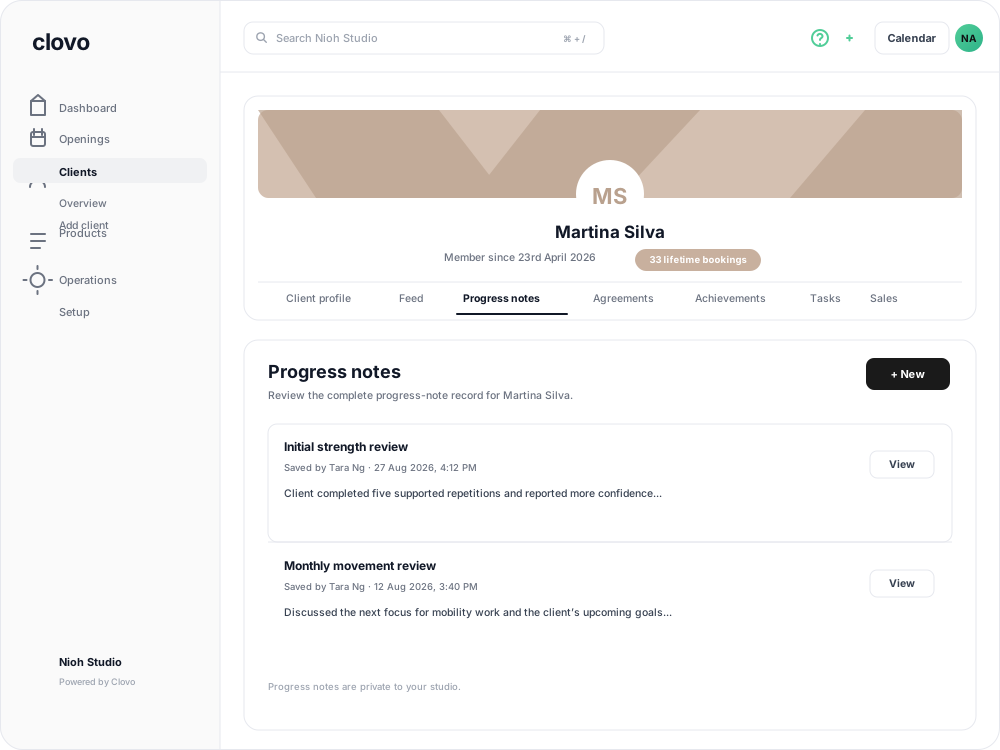
Write and save a note
Clovo suggests a title using the client’s name and the date. You can replace it with something that will help your team recognise the note later.
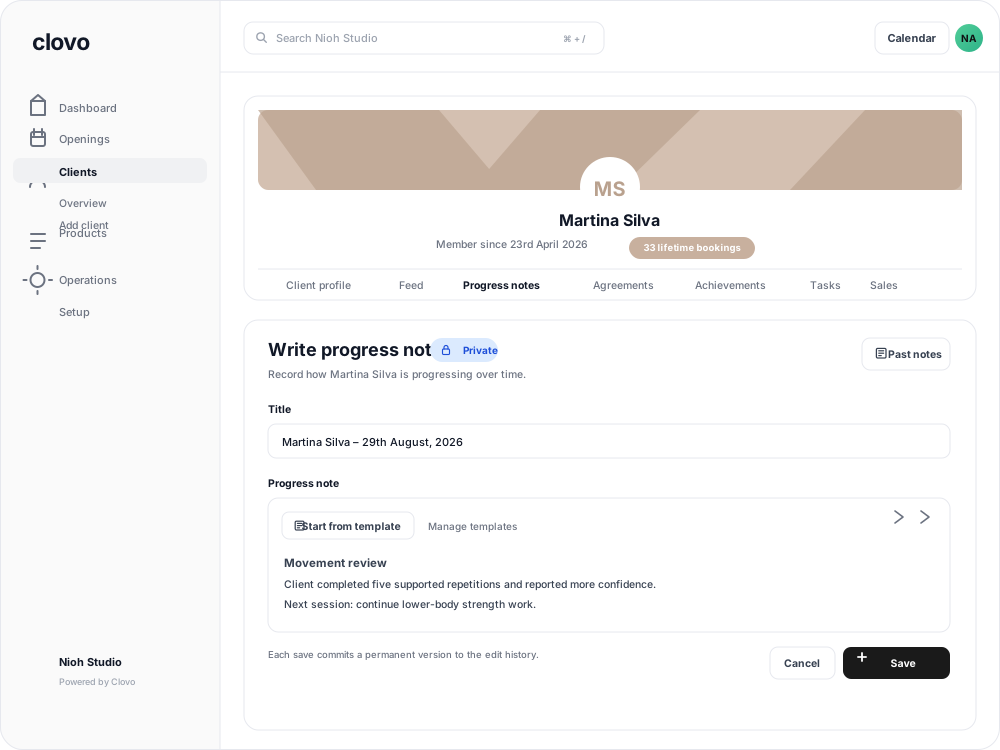
- Check or edit the Title.
- Enter the note under Progress note.
- Add headings, lists or other formatting if they will make the note easier to scan. Type
/in the editor to open the formatting menu. - Select Save.
- When Clovo asks Save this version?, select Confirm.

If you select Cancel at the confirmation step, you return to the editor with your changes still there.
Keep the title to 200 characters or fewer and the note to 8,000 characters or fewer. If either is too long, or the note is blank, Clovo shows what needs changing before you save.
Open past notes while writing
Select Past notes while writing when you want to refer to an earlier observation without leaving the editor. The newest notes appear first, with options to View, Edit or open Version history.

Read, edit and export a note
Open a note from the Progress notes list and choose the action you need:
- Edit progress note opens the note in the editor so you can update it.
- Version history shows the note’s earlier versions and what changed between them.
- Export PDF downloads the saved note as a PDF.

When you edit a note, select Save changes, then Confirm. The earlier version remains available in Version history.
Review version history
Select Version history when you need to see how a note has changed. Each version shows who saved it and when, and the current one is marked Latest. For edited versions, Clovo highlights the text added or removed since the previous save.
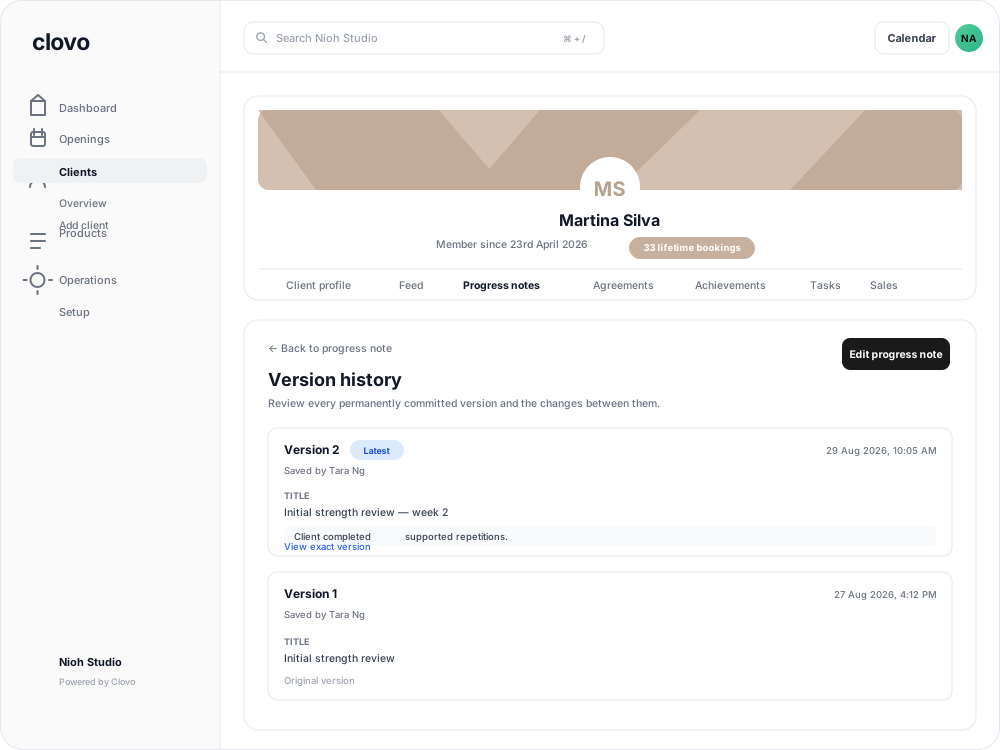
Select View exact version to read that version in full.
Create reusable templates
Templates are useful when your team records the same kind of check-in regularly. They provide a consistent starting point while leaving room for the details that are specific to each client.
- Open a client’s Progress notes tab and select New, or open an existing note and select Edit progress note.
- Select Manage templates beside the editor.
- Select New template.
- Enter a Template name and build the Template content.
- Add any fields you want Clovo to fill in when someone uses the template.
- Select Save template.
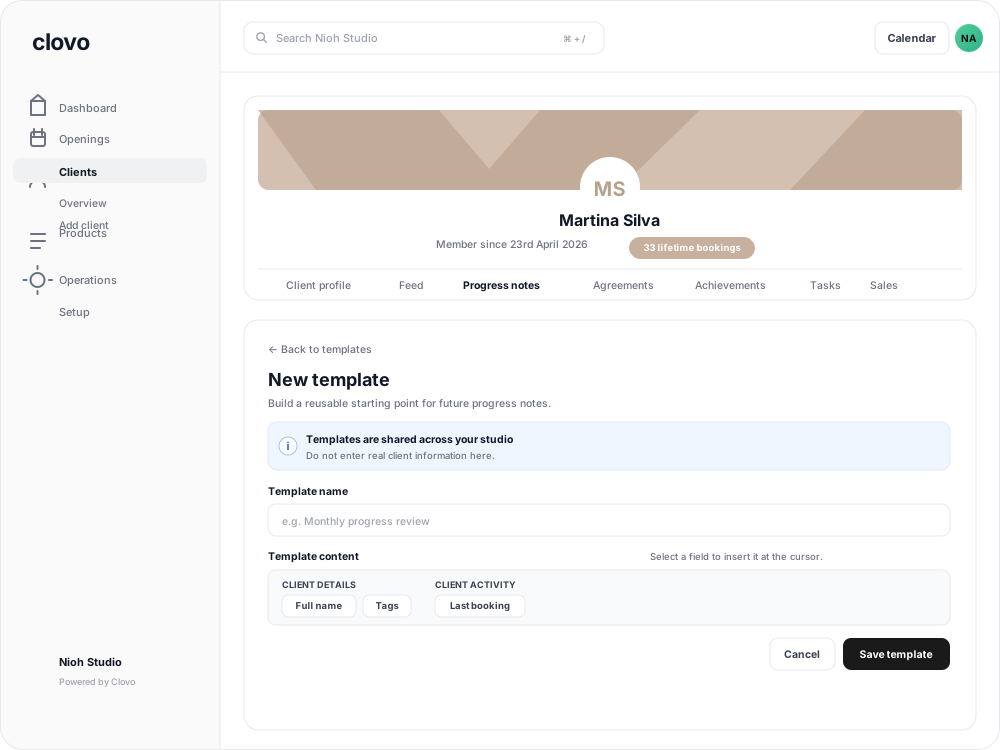
Everyone at your studio who can write progress notes can use these templates. Keep client-specific information out of the template itself. For details such as a client’s name or the date, add the matching field and Clovo will fill it in when the template is used.

To use a template, return to the Progress note editor and select Start from template, then choose the template you want. If you have already started writing, Clovo asks before replacing your current note.
Who can see Progress Notes
The Private badge is a reminder that Progress Notes are for your studio’s staff. Clients cannot see them in the Clovo app. If you need the client to receive a message or instruction, send it through a client-facing channel instead.
Within your team, access is narrower still. Owners can always open Progress Notes. Every other staff member needs the Client Records role, and that role covers the notes, their version history and the shared templates. Staff without it cannot open any of them.
An owner, or a staff member with the Setup role, adds the role from Setup → People → Staff Accounts. See Add a staff member and give them access.
Related articles
Add a client to your studio manually
Create a client profile from the dashboard, record the required consent dates, confirm the email address, and understand which emails the client receives straight away.
Archive a client without deleting their history
Archive a client to hide them from day-to-day lists and stop them signing in, while keeping their record so you can bring them back later.
Deleting a client from your studio
Schedule a client for permanent deletion, cancel it while the grace period is still running, and understand when immediate deletion is available.
Track attendance by checking-in clients on your phone or desktop
Check clients in to record who attended a class in addition to who booked.