
Add a client to your studio manually

Tobias Gundry
Updated
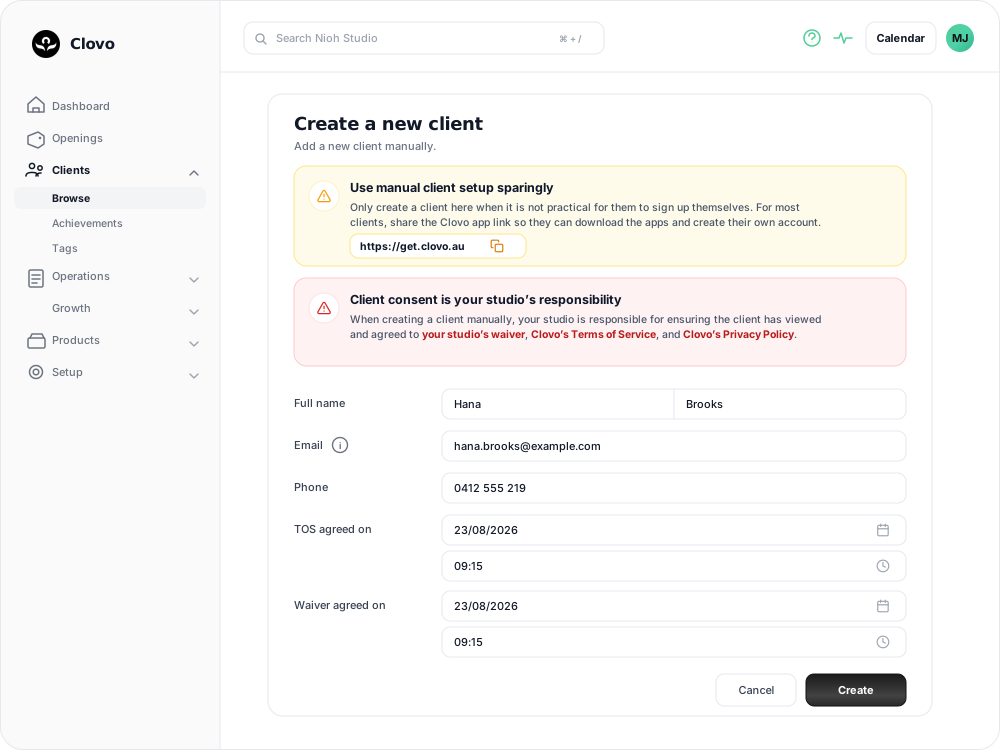
Most people join your studio by creating their own account in the Clovo app. You can create a profile manually for someone signing up at the desk or for a client you are bringing across from another system.
When your studio creates the profile, you also record the consent the client would otherwise give during sign-up. Check the email address before saving because it cannot be edited afterwards.
Share the app link where you can
The screen offers a copyable link, https://get.clovo.au. When a client can use it, they enter their own details and read and accept the waiver, Terms of Service and Privacy Policy during sign-up.
Consent is your studio’s responsibility
When you create a client manually, your studio is responsible for making sure that client has viewed and agreed to your studio’s waiver, Clovo’s Terms of Service and Clovo’s Privacy Policy. The red banner on the screen links to all three, so you can open them in front of the client or send them across before you go any further.
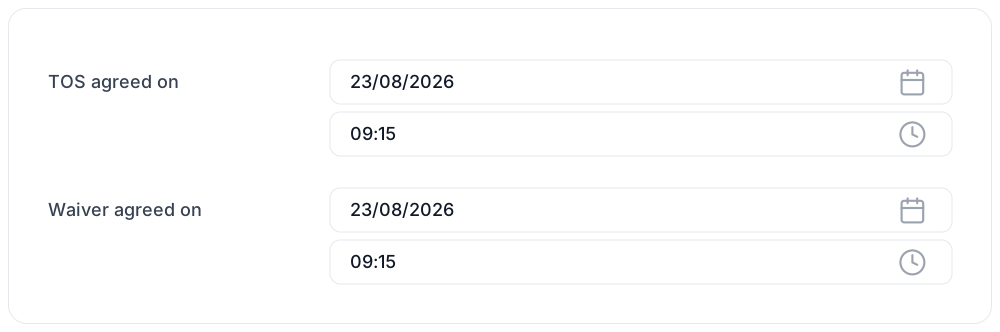
The two dates near the bottom of the form are your record of when that agreement happened, which is why Clovo asks for them rather than filling them in for you.
Create the client
- Go to Clients → Add client.
- Under Full name, enter the client’s first and last name.
- Enter their Email and check it before continuing. The email address can’t be changed from the Edit screen later, and it must be unique within your studio.
- Phone is optional.
- Set TOS agreed on and Waiver agreed on. Each field takes a date and a time, and all four parts are required, so the form won’t submit while one is blank.
- Select Create.
If the email address is rejected
Clovo won’t accept an email address that already belongs to a client in your studio, and archived clients keep theirs. Search your Clients list and check the Archived clients filter. If the person is there, unarchive the existing profile rather than creating a second one — that keeps their bookings, payments and history together.
What the client receives
As soon as you select Create, Clovo emails the new client:
- your studio’s welcome email, including a notice if your studio has forms set to send automatically
- a request to confirm their email address
- a password reset link, which is how they set their own password and sign in to the app
There is no separate invitation to send afterwards. If the client tells you nothing arrived, open their profile and send them a password reset with Send Password Reset. Until they confirm their address, their profile shows Email unverified with a Resend link beside it.
Automatically sent forms are waiting in the client’s Forms area. See send forms to clients automatically.
After the client is created
Clovo opens the new client’s profile. From there you can add tags to organise them, sell them a product through Point of Sale, and book them into a class.
Moving from another system
If you’re bringing a whole client list across from another booking platform, contact Clovo support at hello@clovo.au about a bulk import rather than adding everyone by hand.
Related articles
Archive a client without deleting their history
Archive a client to hide them from day-to-day lists and stop them signing in, while keeping their record so you can bring them back later.
Deleting a client from your studio
Schedule a client for permanent deletion, cancel it while the grace period is still running, and understand when immediate deletion is available.
Track attendance by checking-in clients on your phone or desktop
Check clients in to record who attended a class in addition to who booked.
Answer questions about your clients with Client Insights
Explore attendance, memberships and spending to answer questions about your clients, then save or export the results.