
Give your clients branded support

Tobias Gundry
Updated
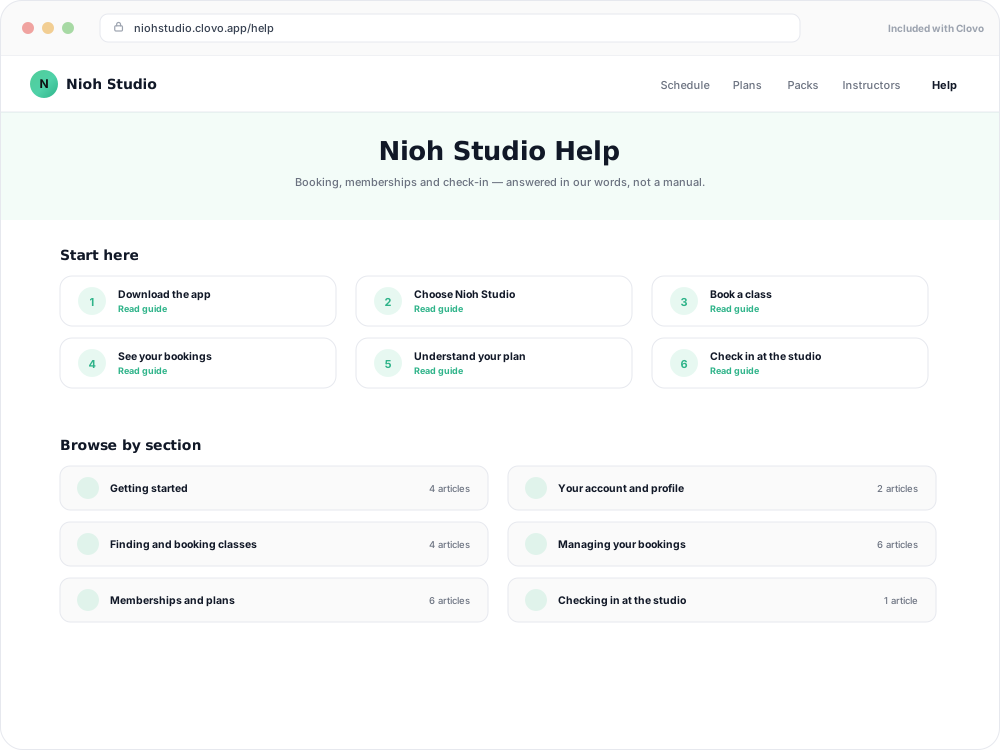
Every Clovo studio has a member-facing help centre, live right now, with no setup required. It sits on your landing page, it’s written in your studio’s voice, and it wears your branding.
Where your members find it
Add /help to your landing page address, or point them at the Help link on the right-hand side of your landing page navigation. It’s there on desktop and inside the menu on mobile.
That link is always visible, alongside Schedule, Plans, Packs and your other sections — so members who are already browsing your timetable can get to it in one tap.
What’s in it
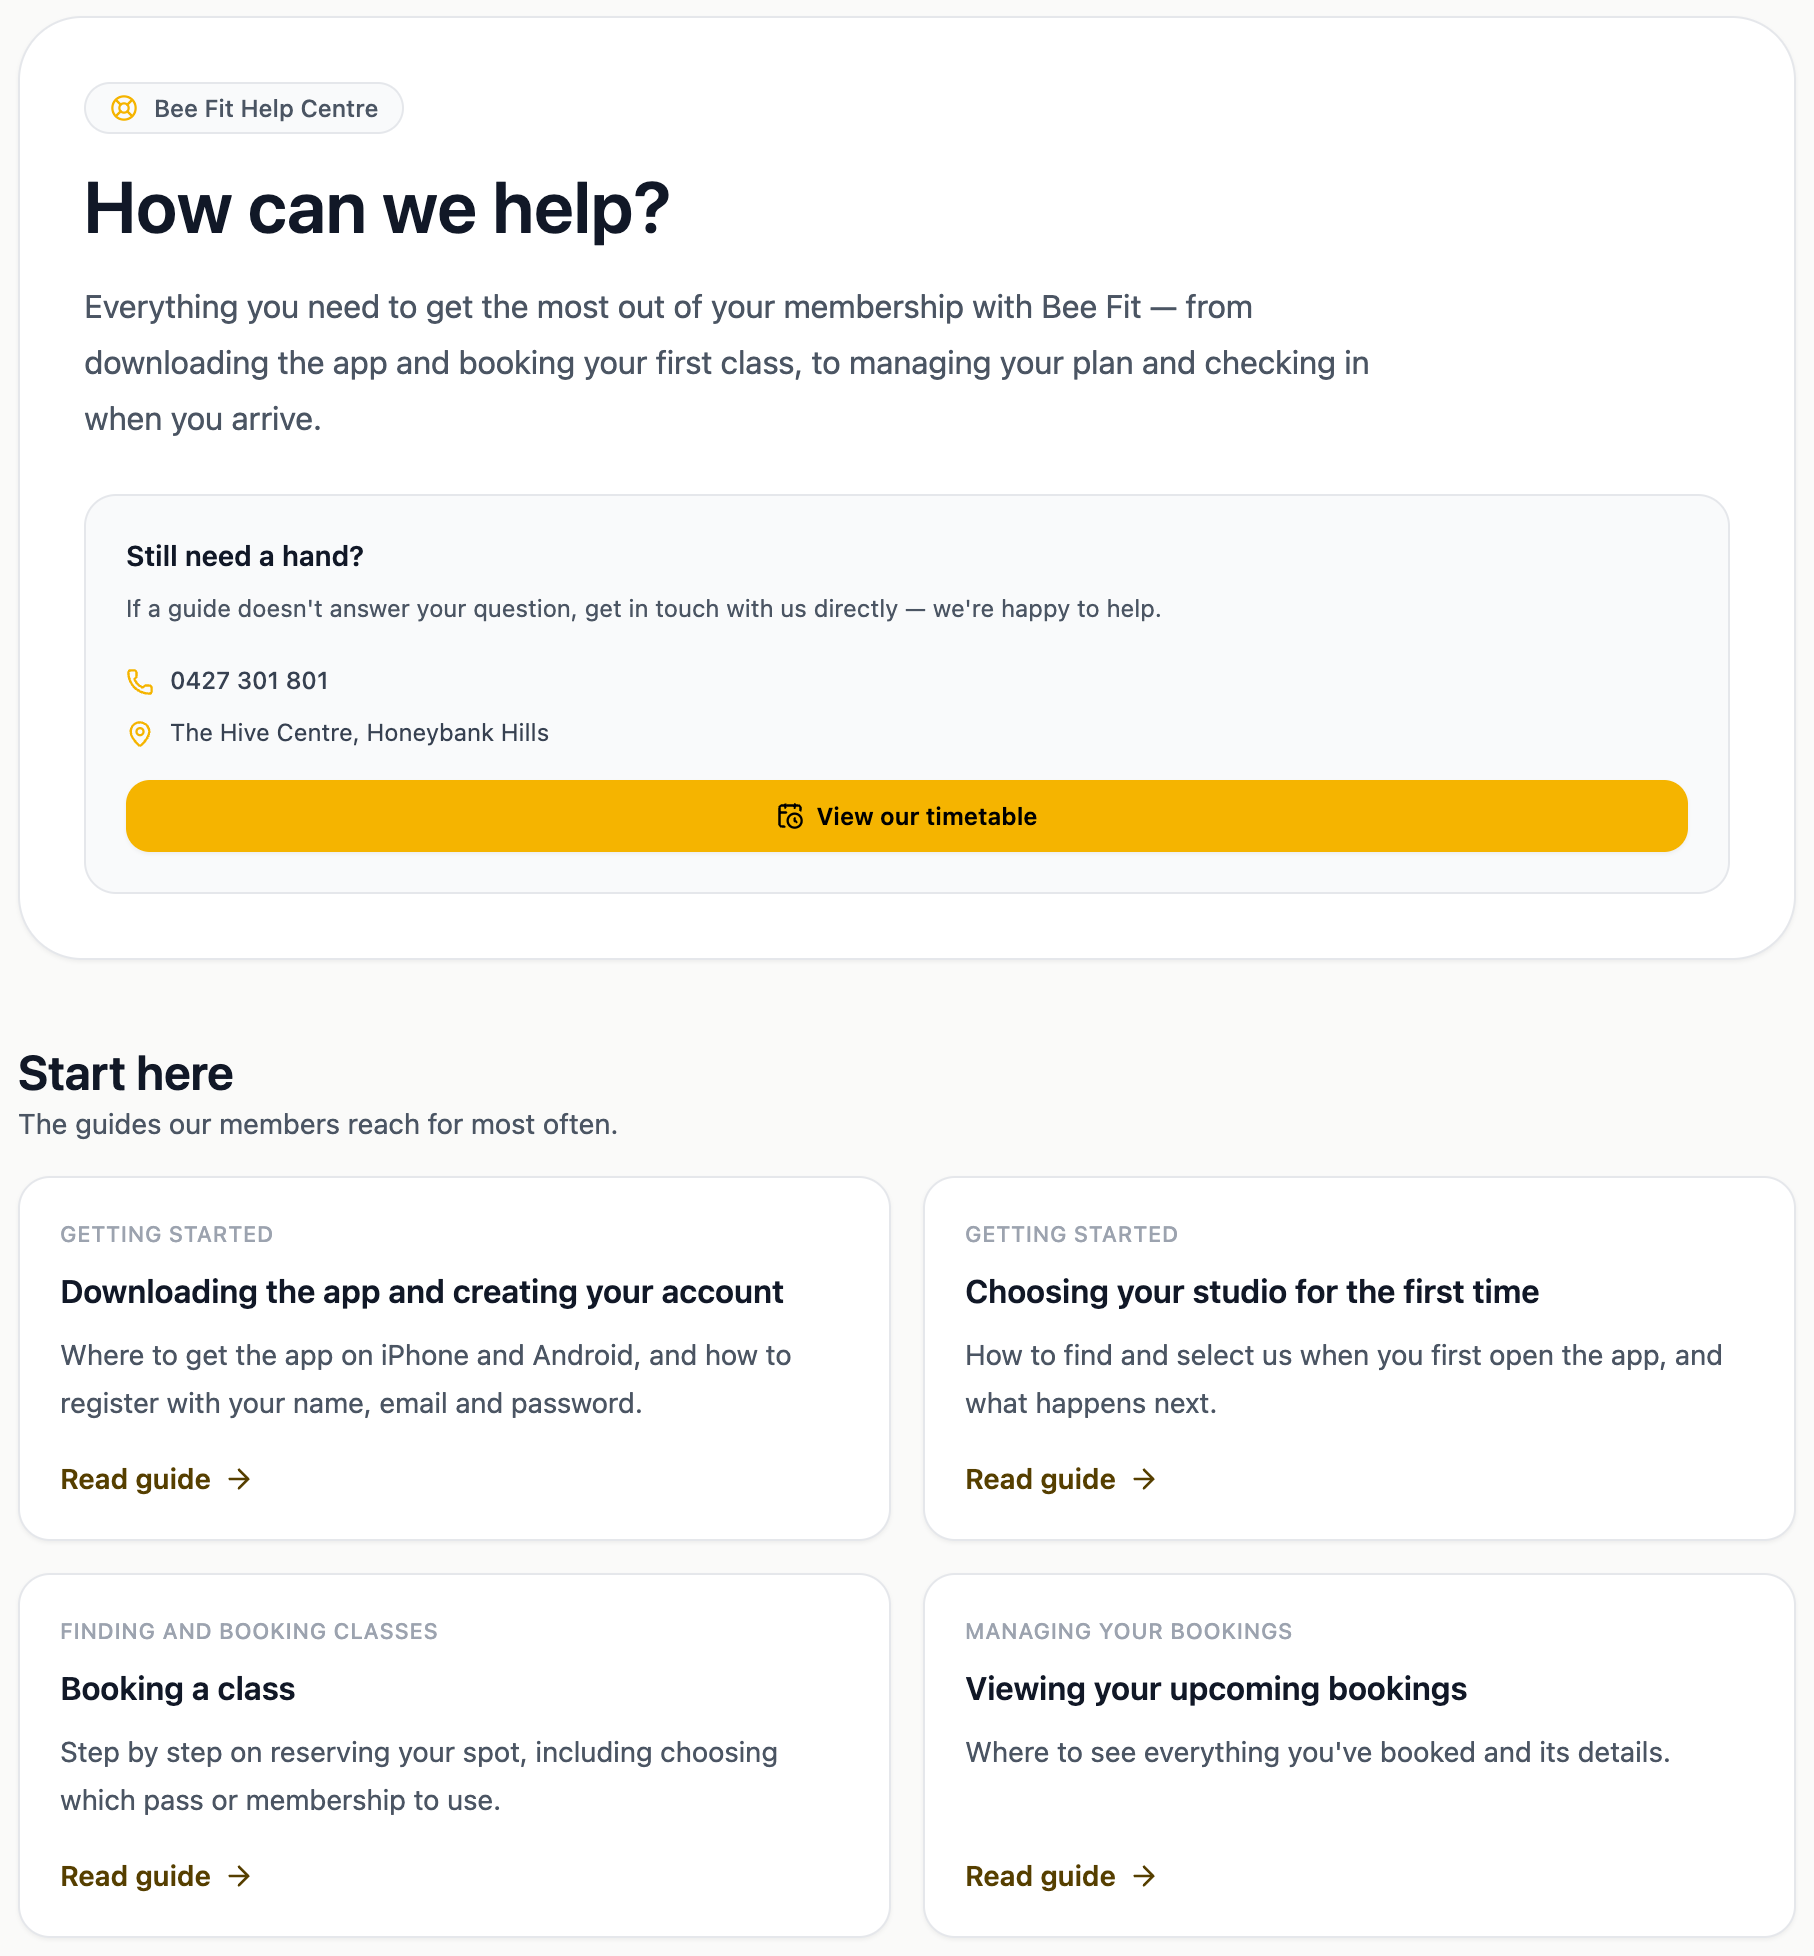
The help centre covers getting started, accounts, bookings, memberships, checking in, and troubleshooting. A Start here panel highlights common tasks such as downloading the app, choosing your studio, booking a class, and viewing upcoming bookings.
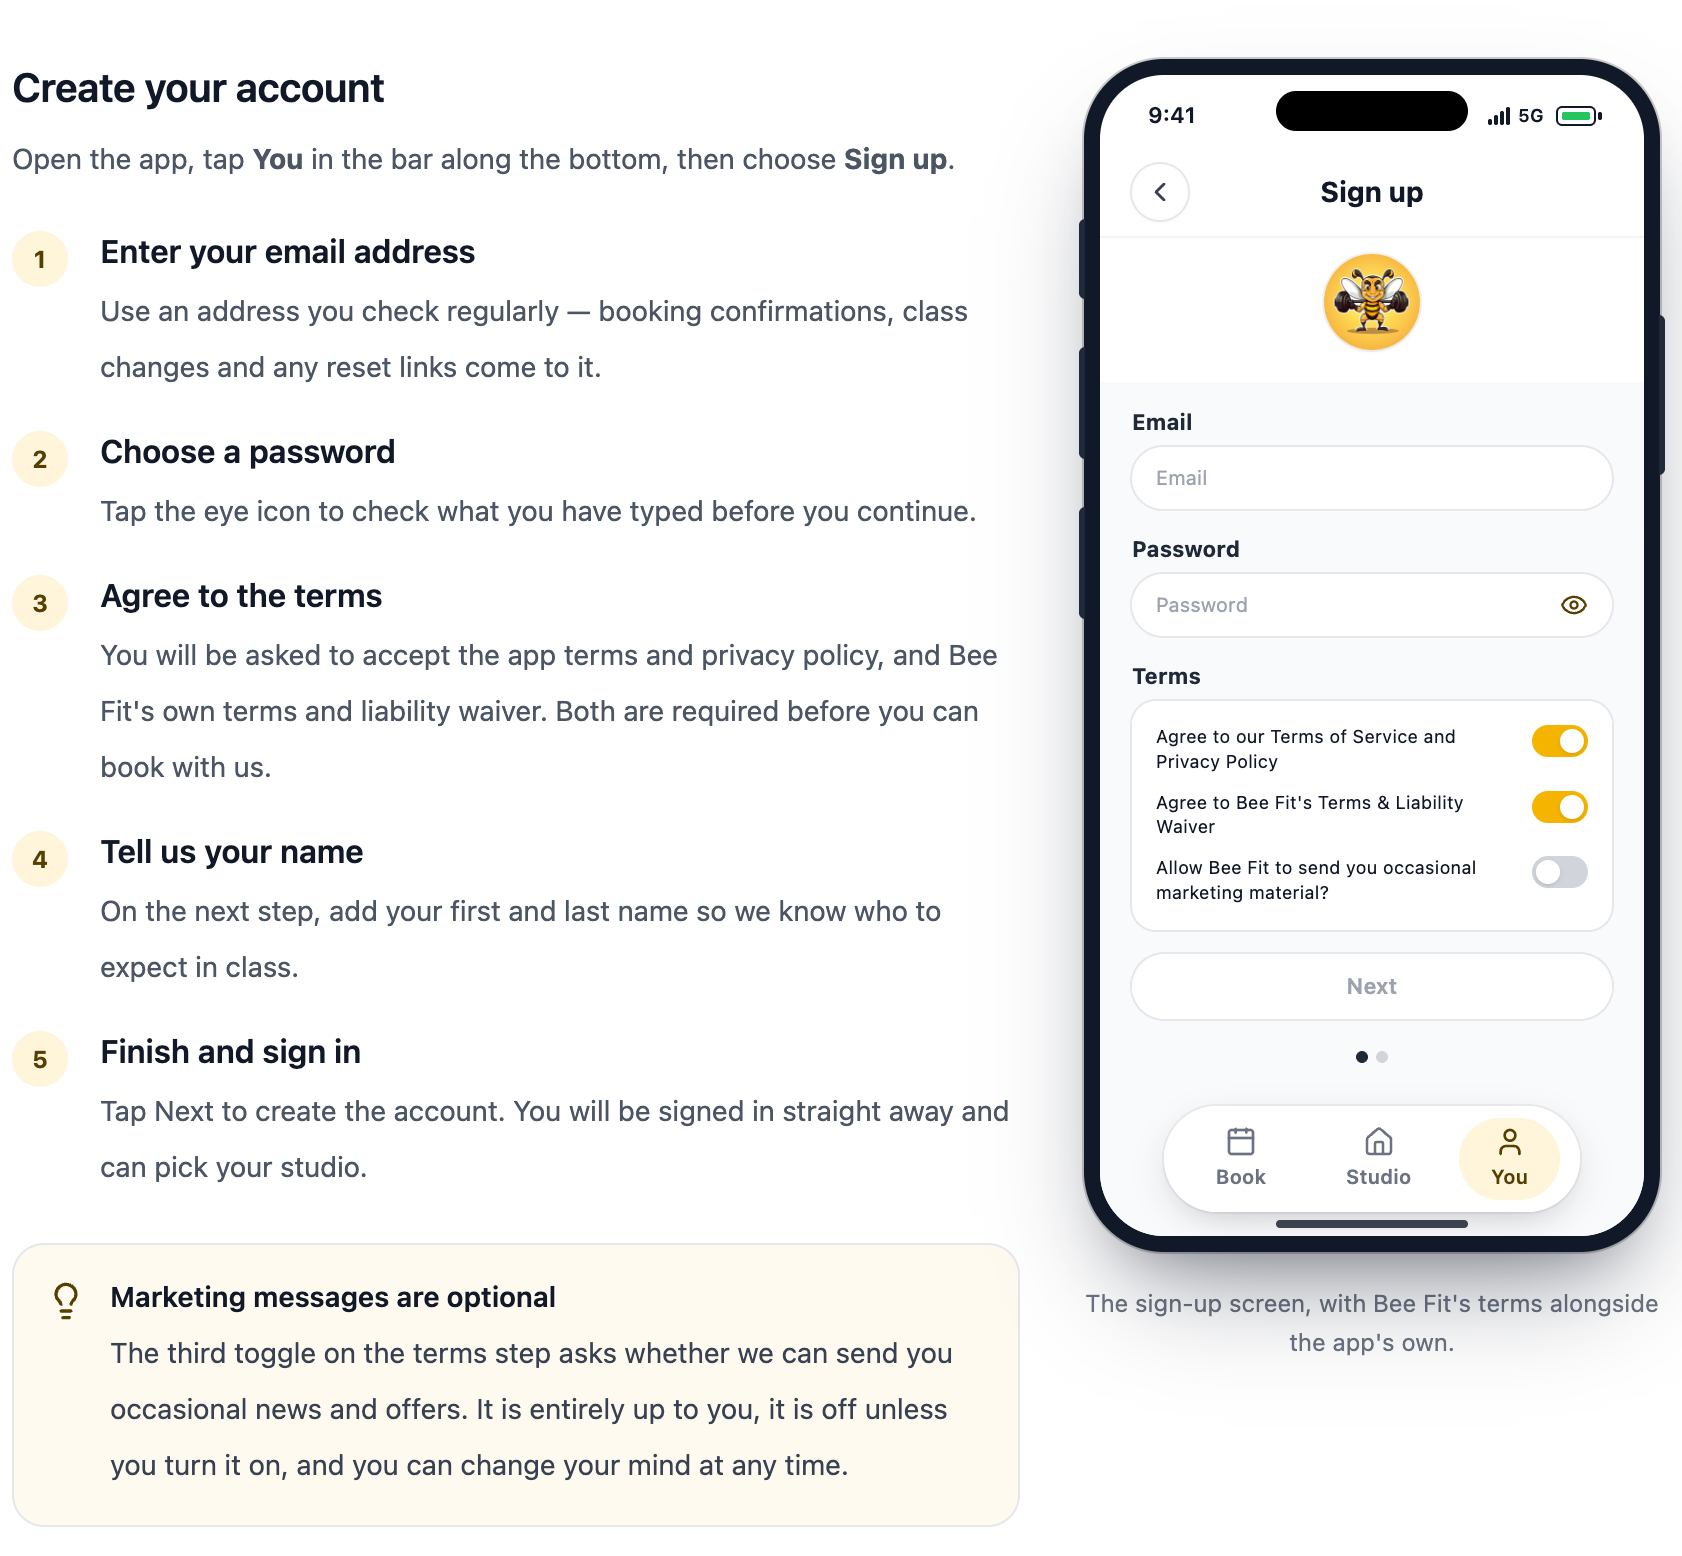
Every article is illustrated with a phone mockup of the relevant screen, so members can match what they’re reading to what’s actually in front of them.
How it adapts to your studio
The help centre uses your studio name, logo, colours, suburb, and contact details. Its screenshots and instructions are also adapted to match what your members see.
Each article includes a Still need a hand? card with your available contact details and a link back to your timetable. Your liability waiver is linked in the footer. Changes to your studio branding flow through to the help centre automatically.
Putting it to work
A few things studios do with it:
Link it in your welcome email. New members get a place to go before their first question reaches you.
Pin it in your members’ Facebook group or wherever your community lives.
Send a single article, not the whole centre. Every article has its own address, so “here’s how to cancel” can be one link in a reply.
Keep it at the front desk. When someone asks how the app works, the answer is a link rather than a five-minute demonstration.
Use it during onboarding. The Getting started section walks a brand-new member from downloading the app to their first booking.
Frequently asked
Do I need to turn it on? No. If your landing page is live, so is your help centre.
Can I edit the articles? Not currently. They’re maintained centrally, which means they’re kept accurate as the app changes without any work from you.
Will members see Clovo branding? The articles are written in your studio’s voice and carry your branding. The app is named where members search for it in the App Store or Google Play, so they know which app to look for.
What if a member’s question isn’t covered? Every article carries your studio’s contact details in the sidebar so the member can ask your team for help.
Related articles
Answer questions about your clients with Client Insights
Explore attendance, memberships and spending to answer questions about your clients, then save or export the results.
Export your client data
Download your client list from Clovo Dashboard as a CSV, choosing which client groups to include and knowing which columns the file carries before you take it anywhere else.
Add a client to your studio manually
Create a client profile from the dashboard, record the required consent dates, confirm the email address, and understand which emails the client receives straight away.
Add a Meta pixel and Google tags to your landing pages
Connect Meta and Google to your Clovo landing pages, publish your studio privacy policy, set up optional Google Ads conversions, and understand visitor consent and reporting.