
Schedules in Clovo

Tobias Gundry
Updated
Your schedule is the typical week of classes at your studio. Clovo takes that weekly pattern and keeps a rolling set of bookable openings available to your clients, so you set the timetable once rather than publishing classes week by week.
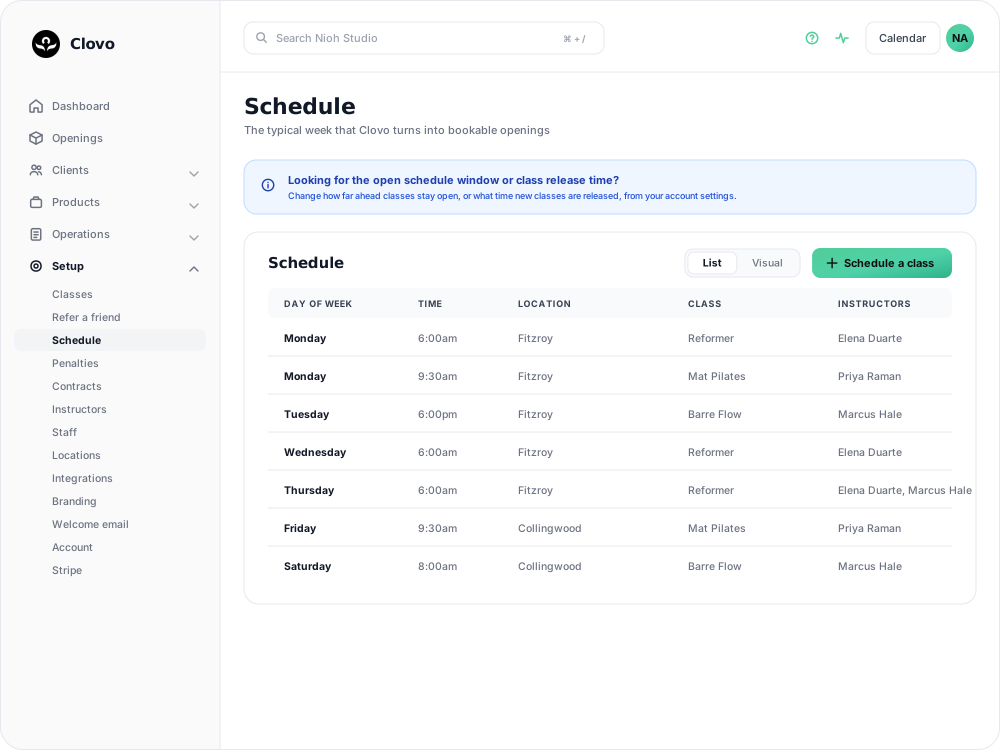
What one schedule entry holds
A schedule entry is a single class, on one day, at one time, in one place. The form asks for five things:
- Day of week — a row of day buttons from Mon through to Sun
- Time — the time the class starts
- Class — which of your class types runs
- Location — the studio or room it runs in
- Instructors — tick everyone rostered to teach it
Each entry covers one day and one time only. A 6am Reformer class on Monday, Wednesday and Friday is three entries, not one.
The form also has a Priority Booking Window section, which holds each new opening for a chosen list of clients, plans or tags for a set number of hours before booking opens to everyone. It is off unless you switch it on, and it is set per schedule entry — see give chosen members first access to a class with a priority booking window.
How a schedule becomes bookable openings
An opening is one individual, bookable instance of a scheduled class — the 6am Reformer on Monday the 14th, rather than ‘Mondays at 6am’.
Clovo keeps openings available for a fixed distance into the future, set by Open schedule window on the Settings tab of the Schedule screen. It defaults to 14 days and can be set anywhere from 1 to 90 days. The window slides forward each day: as one day passes, a new day at the far end opens for booking.
Two settings shape that, both on that Settings tab and both covered in choose what times your new classes get released for booking:
- Open schedule window — how many days ahead classes stay open
- Class release time — the time of day the newest day's classes are released
When you save a new schedule entry, Clovo creates the openings that fall inside your current window straight away. You do not need to wait for the release time to see them; the release time only governs when each new day at the far end of the window appears.
Before you can add a class to the schedule
You need at least one class and at least one instructor first. If either is missing, Clovo shows Setup your classes first or Add your instructors first in place of the form, with a button to create the missing one.
Adding a class from the List view
- Go to Setup > Schedule.
- Select Schedule a class. If you have no entries yet, the button reads Create schedule.
- Pick the Day of week.
- Set the Time the class starts.
- Choose the Class.
- Choose the Location.
- Tick the Instructors teaching it.
- Select Create.
Clovo returns you to the schedule list with the new entry in place.
Building a timetable in the Visual view
The Schedule screen has two views. List is the table of entries above; Visual lays the same entries out on a seven-day grid, which is faster when you are building a timetable from scratch or checking for clashes.

In the Visual view, the hours of the day run down the left and Monday to Sunday run across the top. Each scheduled class sits at its start time as a coloured block sized to the length of the class, showing the class name, its start time and location, and the first assigned instructor.
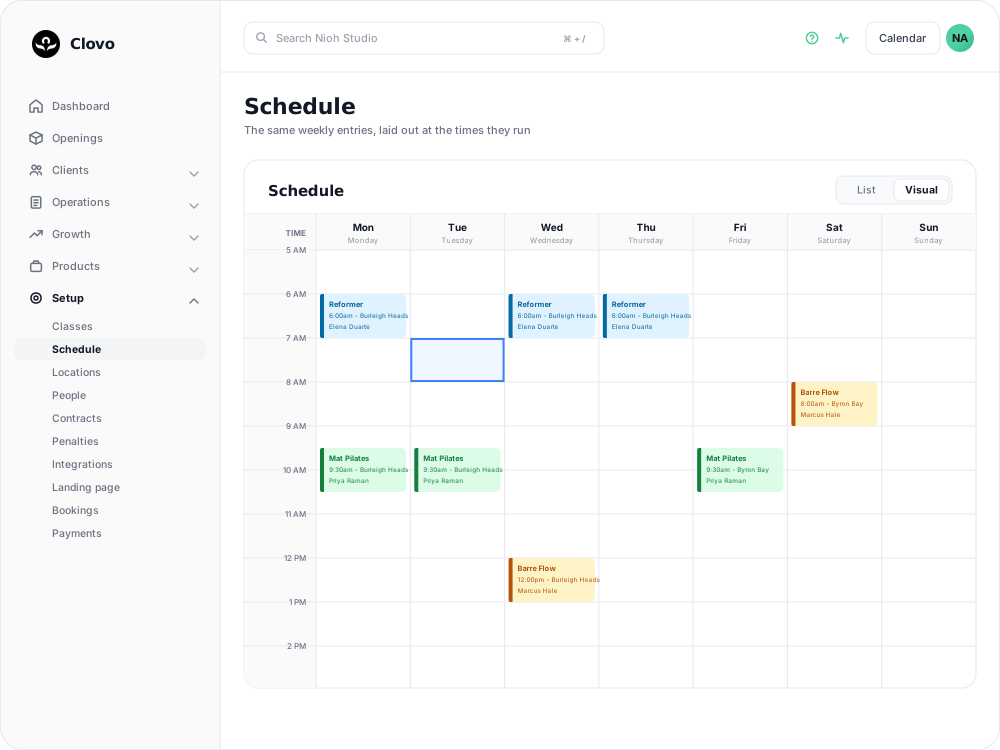
- Select an empty slot to open the Schedule a class form with the day and time already filled in. Where you click inside the hour sets the minutes, to the nearest quarter hour, so you can still adjust the time in the form.
- Select an existing block to open that entry's edit form without leaving the grid.
The Schedule a class button is not shown while you are in the Visual view — selecting a slot is how you add an entry there.
Changing or removing an entry
Select a row in the List view, or a block in the Visual view, to open the schedule. The detail page shows the day, time and instructors, the Regulars for that class, and the openings created from it so far. Two buttons sit under the details: Change schedule and Delete.
Neither one changes openings that already exist. If the entry has open classes, Change schedule and Delete both take you through a review step first: it shows what is changing and lists the openings already created, so you can choose which of them to cancel. Openings you leave unselected stay open with their bookings intact, still running at the old day and time. Changing class schedules with existing openings walks through that step.
Deleting an entry stops any further openings from being created from it. Openings already generated keep running unless you cancel them.
Booking regular clients in automatically
The Regulars panel on a schedule's detail page holds clients who are booked into every new opening of that class automatically, each against the membership paying for their place. Use Add regular to add one. See how to automatically book regular clients into new openings.
Where your openings appear
Openings are listed under Openings in the main navigation, grouped by date. Each row shows three columns:
- Class — the class name
- Date — the full date and start time, how long until it starts, the location, and a pill for each instructor teaching it
- Bookings — booked against capacity, such as 3/20
Manage on any row opens that opening, where you can see and adjust its bookings. Past Openings switches the list to classes that have already run. Add Scheduled is a shortcut to the same recurring-schedule form, so you can add a weekly class without going back to Setup.
One-off classes and closures
For a class that happens once — a workshop, a guest instructor, a holiday session — use Add Pop-up on the Openings page instead of adding and later deleting a schedule entry. A pop-up takes a specific date rather than a day of the week. See offer popup classes for one-off unscheduled offerings for your clients.
To close the studio for a period, use Operations > Closures rather than removing schedule entries: see temporarily close your studio with closures. To call off a single class, see cancelling upcoming classes.
Related articles
Choose what times your new classes get released for booking
Choose the time of day when new class openings become available for clients to book.
Share your timetable with clients, wherever they are
Your landing page is a public, always-current timetable anyone can open without the app. Share the whole thing, a single class, a social image, or embed it in your own website.
Assign a substitute instructor for a class
Put a different instructor in front of a single class opening, and know what your clients will and won’t be told about the change.
Cancel upcoming classes that have already been scheduled
Cancelling an opening cancels every booking on it and returns credits automatically, but direct purchases are not refunded for you.