
Getting started with Clovo: your complete setup guide

Tobias Gundry
Updated
Clovo puts a setup checklist on your dashboard the first time you sign in, and keeps it there until every required step is done. This guide walks the same steps in the same order, and adds the decisions each screen asks you to make.
Before you start, have your studio address and ABN handy, along with your class list, instructor names and photos, your logo and brand colours, your pricing, the bank details Stripe will pay out to, and the terms or liability waiver you want clients to accept.
Register your studio
Registration is two pages. Start at studio.clovo.au/register.
The first page, Get Started Now, collects your email address, first and last name, an Australian mobile number, your business name, and a password. The password needs at least 10 characters, including an uppercase letter, a lowercase letter and a number. You also agree to the terms here.
The second page, You're nearly done!, collects your studio's street address, suburb, postcode and Australian state, then an optional ABN and ACN. Two things follow from what you enter:
- The state you choose sets your studio’s timezone. Each location has its own timezone, and class times use the location where the class takes place.
- Once you enter an ABN or ACN, a GST registered switch appears. With it on, client invoices are titled Tax Invoice and include a GST breakdown. Prices you enter later are inclusive of GST, so this setting changes how those prices are presented rather than what clients pay. See Add GST and your ABN to client invoices.
Choosing Finish creates your first studio location from that address and takes you to the dashboard.
Work through the setup checklist
The checklist shows how far through setup you are, the step to do next, and a button on every row that takes you straight to the screen it needs. When the last one is finished, the checklist is replaced by your normal dashboard.
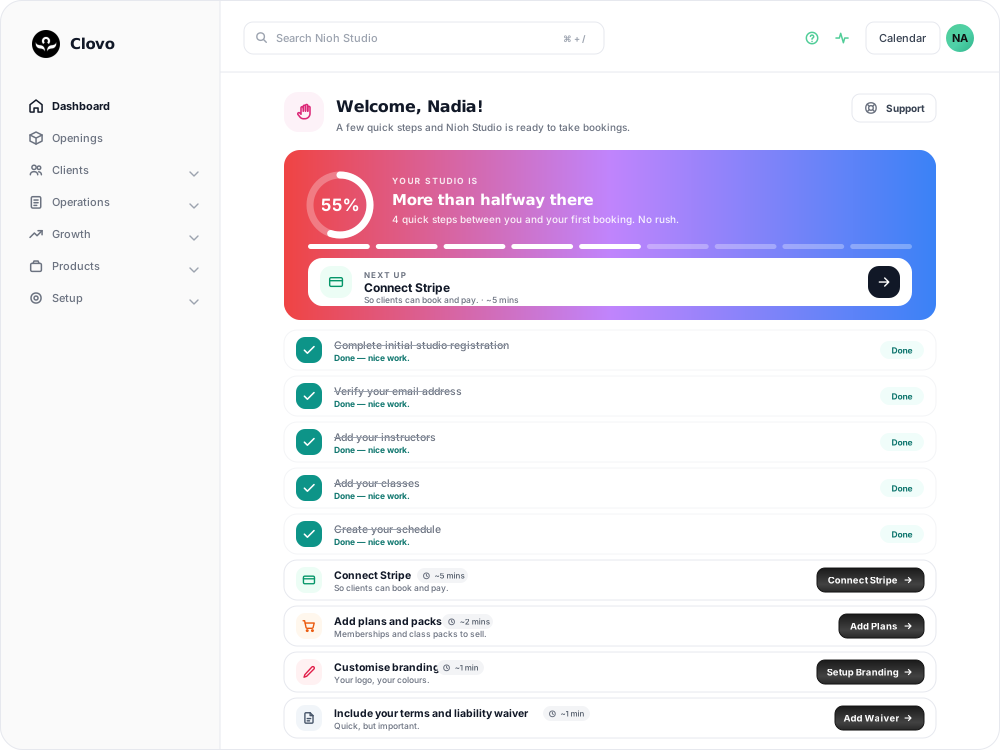
Each row keeps its action button until that step is done, so you can work through them in any order and come back to the rest later.

Verify your email address
Open the verification email sent to the studio owner address and follow its link. If it has not arrived, check your junk folder, then choose Resend Verification on the checklist row.
Add your instructors
Instructors are the people clients see attached to classes. Create a profile for everyone who teaches, including yourself.
Choose Add Instructors on the checklist, or go to Setup → People → Instructor Profiles and choose Add profile — Create instructor while the list is still empty. The form asks for:
- First name, and a Last name if you use one.
- Title — required, and shown to clients. For example, Pilates Instructor.
- A profile photo and a biography.
- Linked Staff Account — optional.
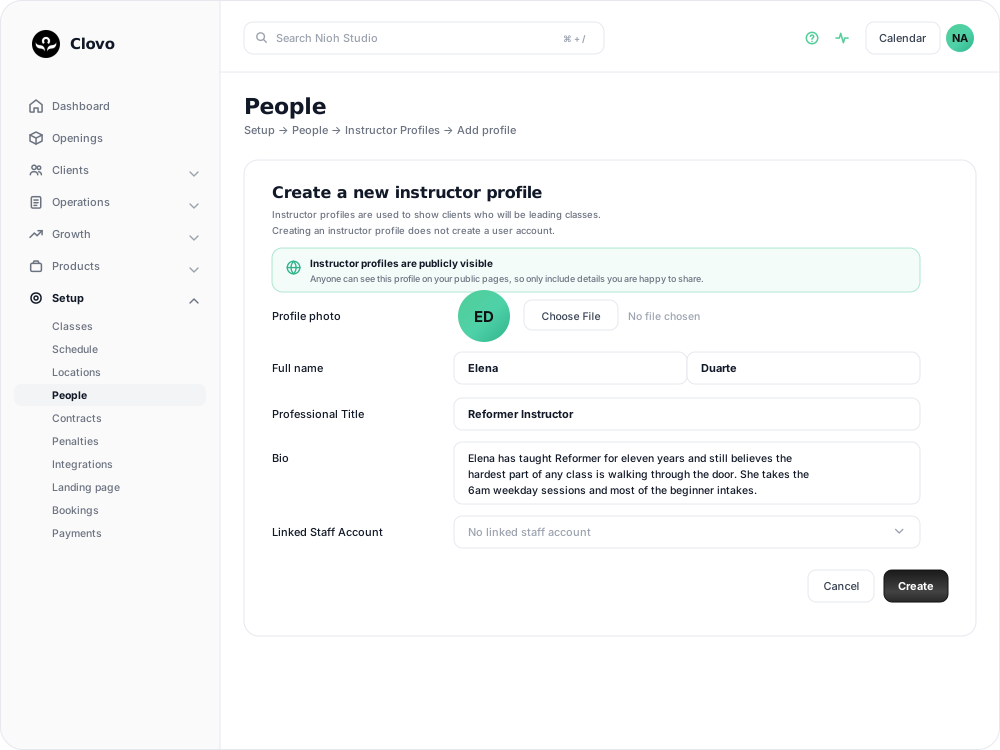
Instructor profiles are publicly visible, so only include details you are happy to share. Creating one does not create a login. Dashboard access is separate, on the Staff Accounts tab of the same screen, and the Linked Staff Account picker is what connects the two when the same person needs both.
For more, see Add and manage your instructors and Linking public instructor profiles to staff accounts.
Add your classes
A class describes what you teach, not when it runs. Create one for each distinct offering, such as Reformer, Mat Pilates or Barre Flow.
Go to Setup → Classes and choose Add class — Create class on an empty list. The form asks for:
- Class type — the activity category, chosen from a searchable list.
- Name and Description, both client-facing.
- Duration, set with a slider or one of the presets.
- Max Participants — the cap for a single session.
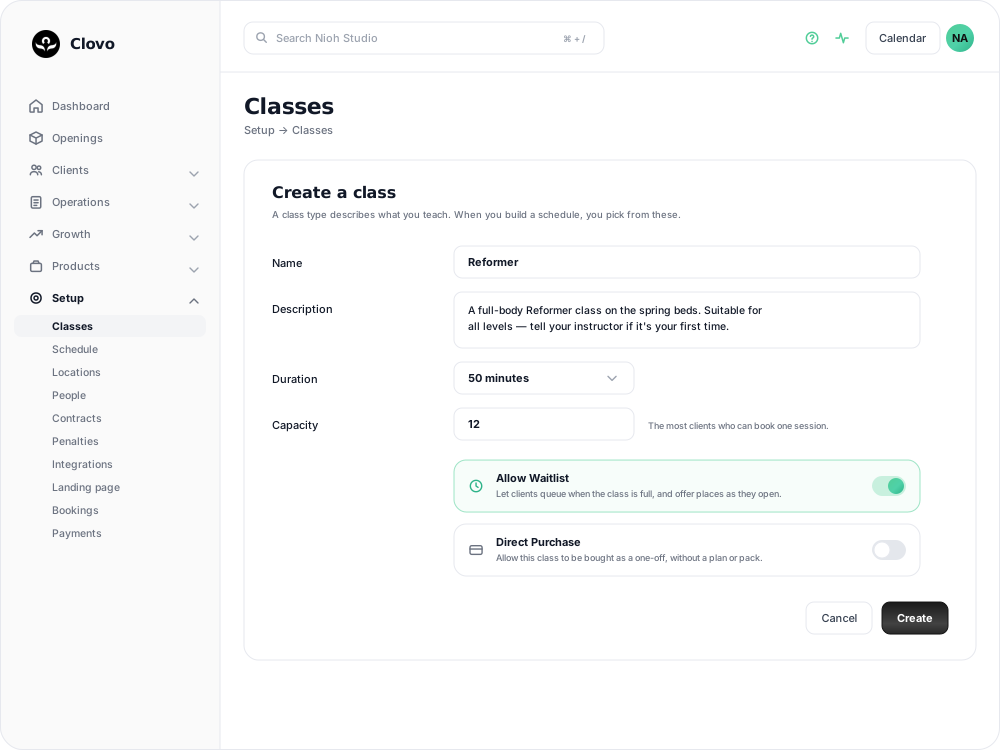
Four switches sit below those fields, and two of them reveal more when you turn them on:
- Direct Purchase lets clients buy this class as a one-off without a plan, pack or trial. Turning it on reveals a price field, which must be at least $5.00 AUD.
- Allow Waitlist reveals the waitlist type choice. Auto, the recommended option, books the next person in line when a place opens. Manual notifies your team and leaves the choice of who gets it to them. Offer notifies everyone on the list, and the first to book takes the place.
- Exempt From Penalties removes this class from your late cancellation and no-show rules, which suits free or promotional classes.
- Custom after booking message sends clients an extra email after they book, for things like equipment to bring.
See Create and manage your class types for more on these settings.
Create your schedule
Your schedule is the recurring weekly pattern Clovo turns into bookable openings. You need at least one class and at least one instructor before you can create one.
Go to Setup → Schedule and choose Schedule a class. On an empty schedule the same form is behind Create schedule.
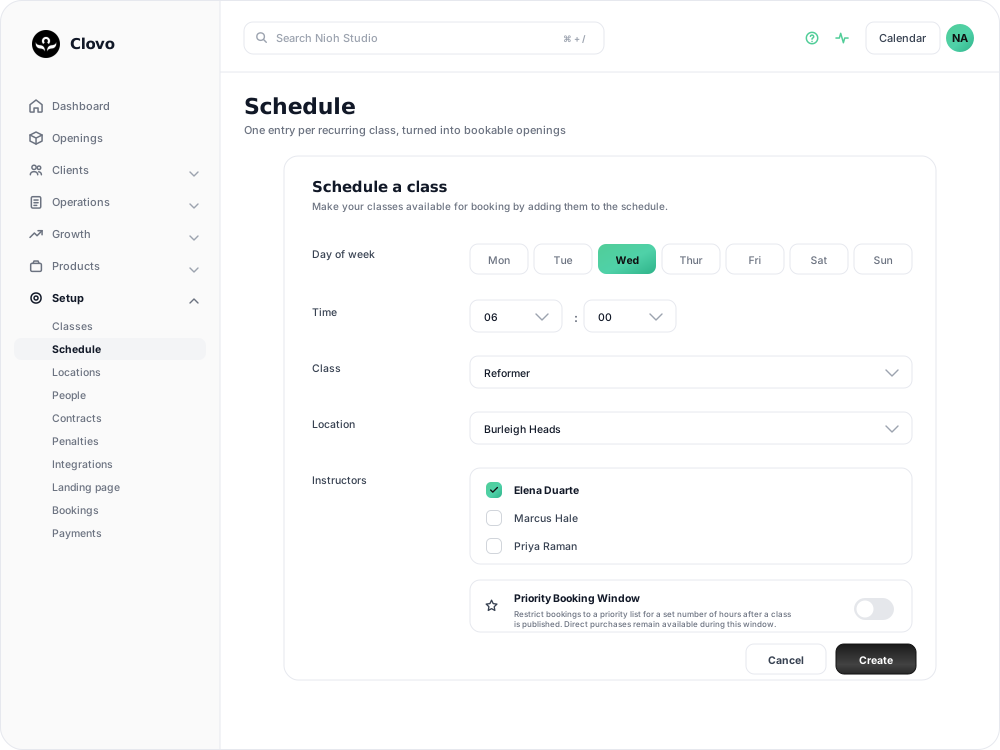
Choose the day of week and time, the class, the location, and one or more instructors. Priority Booking Window is optional: it holds new classes for a priority list for a set number of hours after they are published, and is covered in Priority booking.
Openings are created ahead of time rather than for the whole year. The Settings tab on the same Setup → Schedule screen holds the two controls that decide when clients see them:
- Open schedule window — how many days ahead classes stay open. It starts at 14 days and slides forward each day as new days open.
- Class release time — the time of day new classes are released. Left empty, classes are released as soon as they become due.
Openings themselves live under Openings in the main menu. That is also where one-off classes are created: choose Add Pop-up for a workshop or event that does not repeat, rather than adding a schedule entry you would then have to remove.

For more, read Schedules in Clovo, Choose what times your new classes get released for booking and Offering a one-off class opening.
Connect Stripe
Stripe processes your payments. The Stripe account is yours, and Stripe pays out to the bank account you nominate.
Go to Setup → Payments and choose Connect with Stripe, then work through Stripe's business, identity and bank account questions. If you stop part-way through, the button changes to Finish setup so you can pick up where you left off.
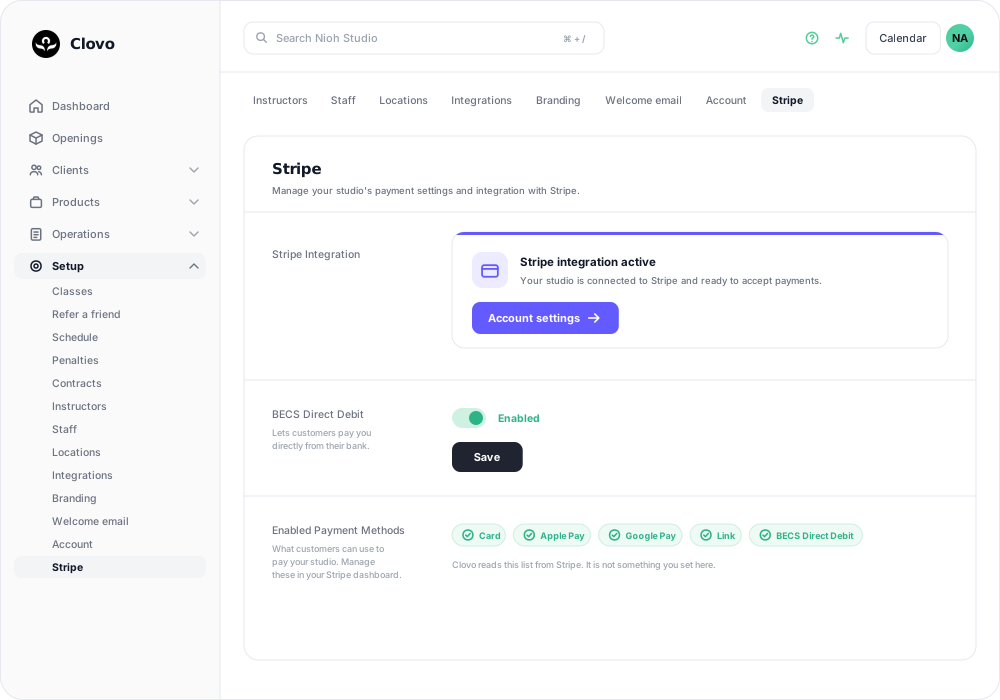
The checklist step only completes once Stripe confirms your account can accept charges, which can take a little time after you finish their form. Wait for that before you publish paid plans or packs. See Start accepting payment with Stripe.
Add plans and packs
Now decide what clients can buy. A membership plan bills on a repeating cycle; a credit pack is a one-off purchase of credits that expire. You can offer either or both. You need at least one class before you can create either.
Membership plans
Go to Products → Plans and choose Add Plan. Give the plan a name and description, use Add class allowance row to group classes under a shared allowance in Inclusions, set the Price in AUD including GST if that applies to you, then choose a billing period: Weekly, Fortnightly, Monthly, Quarterly, 6 monthly or Yearly.
For each new row, choose a number such as 2 of any for two bookings shared across the selected classes, or choose Unlimited. An allowance must be selected before you save.
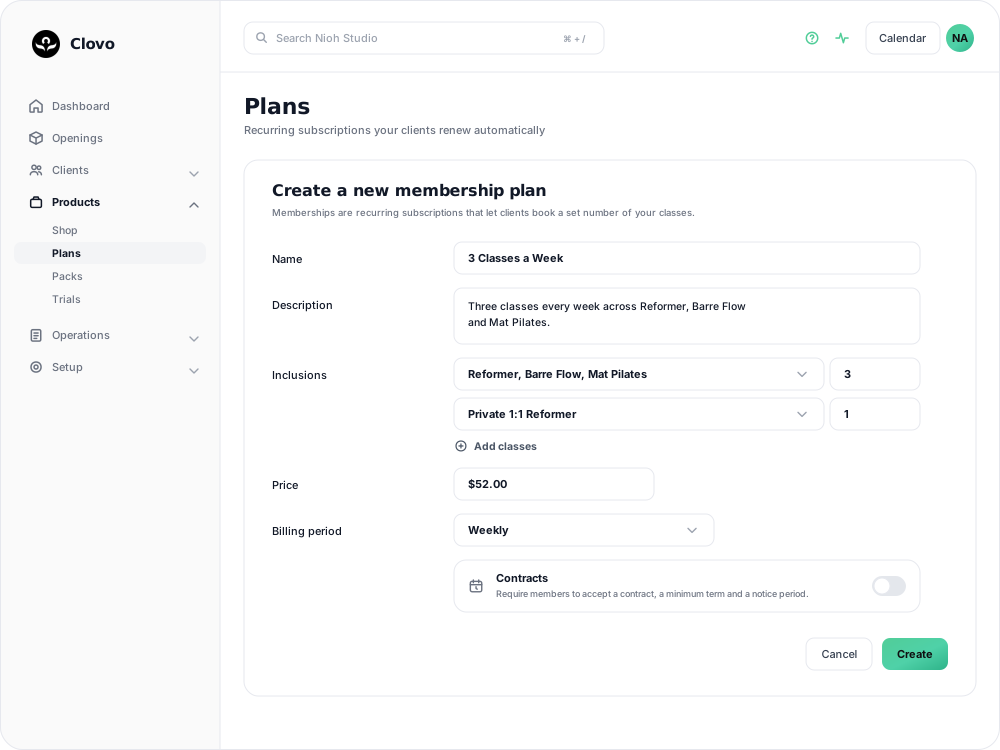
Minimum terms, cancellation notice and contracts are set on this same form and are worth reading about before you publish a plan. See Offer recurring memberships by creating a membership plan and Minimum terms and cancellation notice.
Credit packs
Go to Products → Packs and choose Add pack. Add the name, description, inclusions and price, then set the expiry — between 3 and 365 days from purchase. A hard expiry date is optional and suits a promotion that ends on a fixed day regardless of when it was bought.
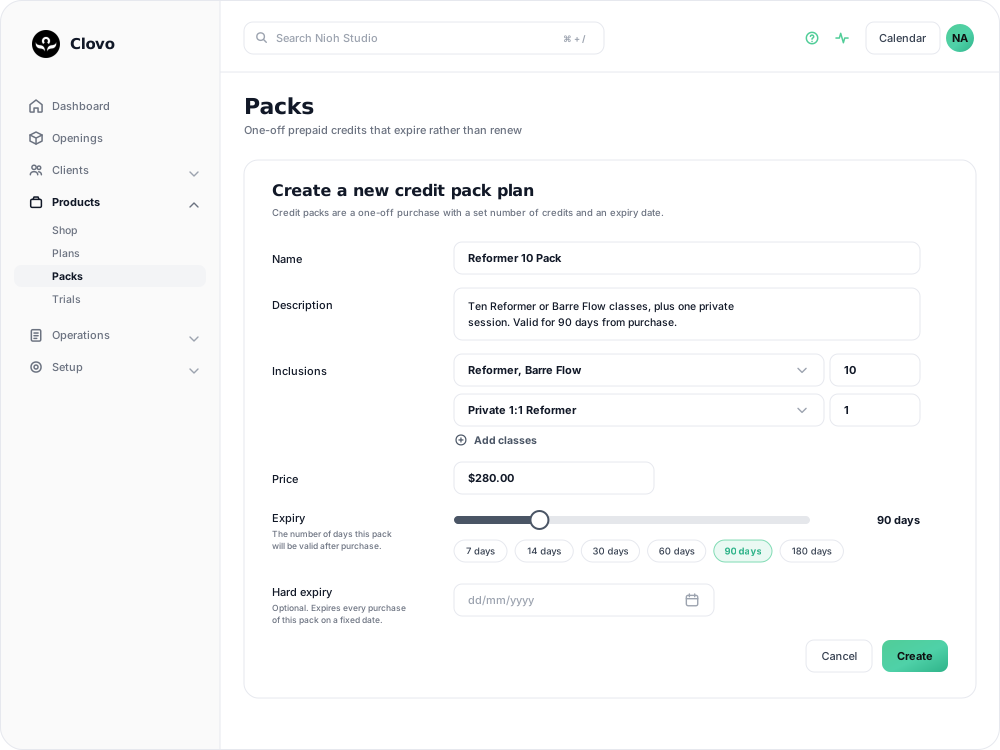
See Credit packs in Clovo for worked examples.
Customise your branding
Go to Growth → Branding. Your logo can be a square PNG, JPG, WEBP, GIF or SVG up to 6 MB, and appears at the top of the Our Studio screen in the client app. Under App colours, set a Primary colour for headings, buttons and highlights, and a Secondary colour used more sparingly.
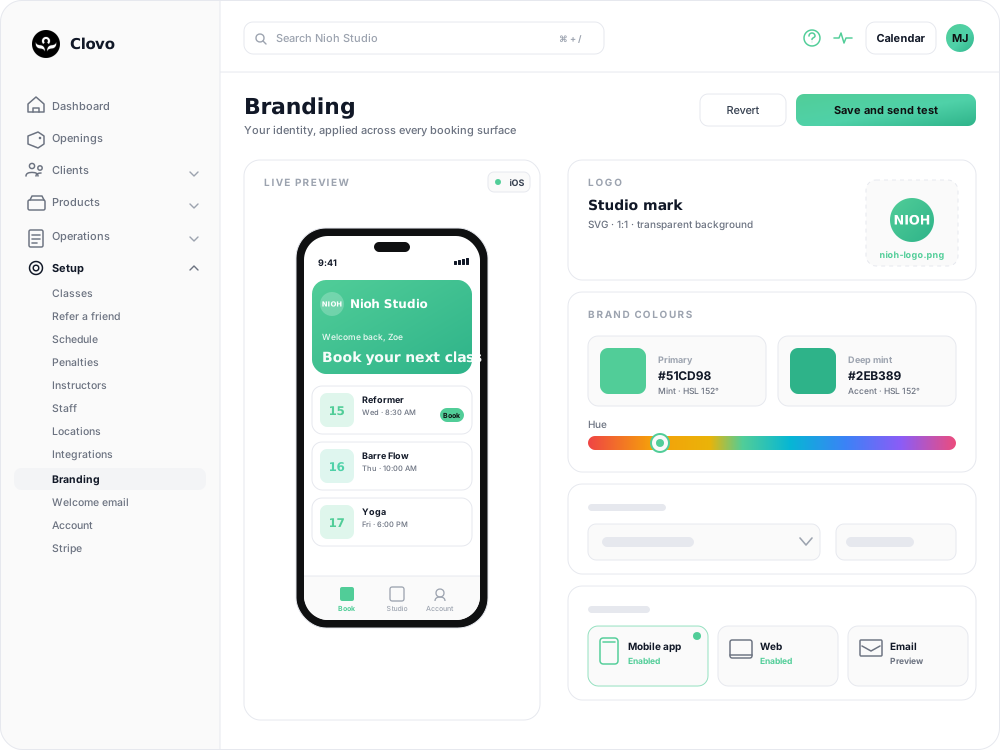
Clovo shows a contrast ratio beside each colour so you can see how readable it will be. The ratios are advice only and do not block your choice. Choose Publish changes to apply them to your apps, emails and landing pages. For more, read Change the branding of your client's Clovo apps.
Add your terms & liability waiver
Clients read and accept your waiver when they register, so it needs to be in place before you invite anyone.
Go to Setup → Contracts, select the Terms & Liability Waiver tab, and paste your complete wording into the field. Choose Save changes when you are ready. Clovo does not supply waiver text or legal advice, so use the wording approved for your business and keep a copy outside Clovo for when your policies change.
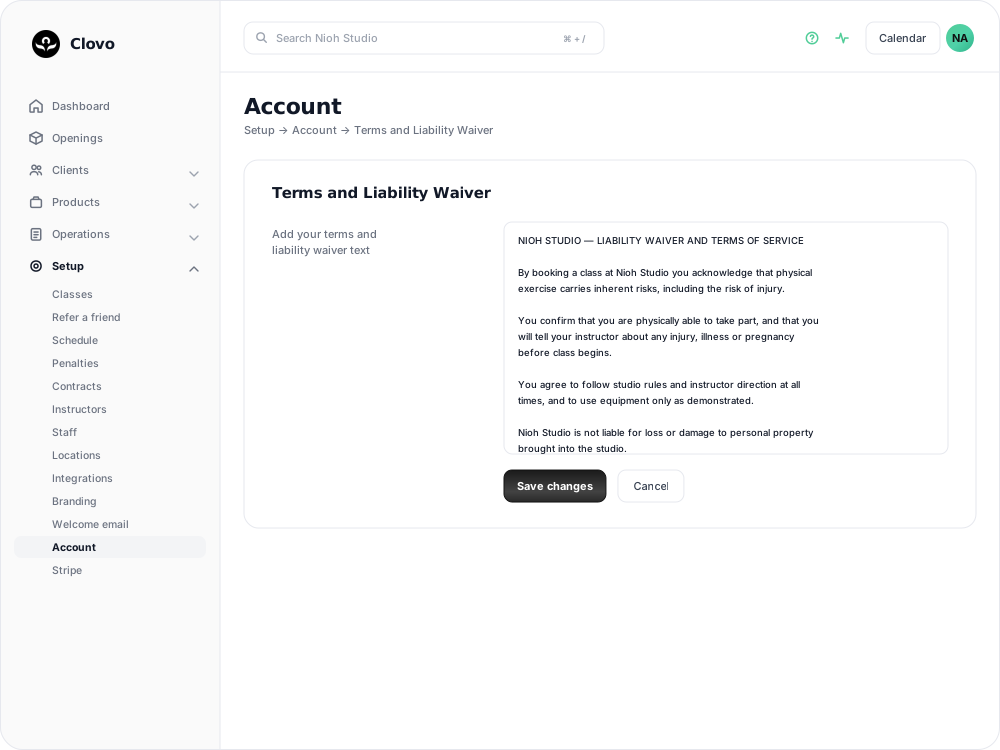
See Add a liability waiver for your studio.
Before you share your booking link
Two checks are worth doing once the checklist is complete.
First, open Openings and confirm the classes you expect are there — right day, right time, right class, right location and right instructor — all the way out to the end of your open schedule window. If something is missing, review its schedule entry and assigned instructor.
Second, register from a separate client account, read the waiver as a client sees it, buy a plan or pack, and book one class. Confirm the booking appears against that client in Clovo and the payment appears in your Stripe account. That single pass exercises registration, your products, your pricing and payouts together.
Optional setup
None of these are needed for your first booking.
- Setup → People → Staff Accounts — dashboard access for the people who help run the studio. See Add staff to your studio.
- Setup → Locations — a second venue with its own address and timezone. See Set up and manage your studio locations.
- Growth → Welcome email — the message new clients receive when they join. If your studio sends forms automatically, this email also names the forms waiting for the client in the Clovo app. See Customise the welcome email that is sent to new clients when they join.
- Setup → Penalties — late cancellation and no-show rules. See Set up late cancellation and no-show penalties.
- Setup → Integrations — your studio code and the connections that put your timetable and products on your own website. See Accessing your Clovo studio code.
- Your landing page — change its public address at any time. See Change the subdomain of your landing page.
You can also sign in to the Clovo app on your phone or iPad as a studio owner to run the desk from the floor. See How to manage your studio from an iPad.
Related articles
How to manage your studio from an iPad
Use the Clovo iPad app to manage classes, clients and staff tasks, or run a self-serve check-in kiosk.
Get started in the Clovo app when your studio moves to Clovo
Your studio now takes bookings through Clovo and has already set up your account. Download the app, find your studio, then sign in with a code sent to your email or set a password with a reset.